Grouping & Nesting
You are viewing documentation for a previous version of Aeon Timeline, version 3.4.
See our guides for the most up-to-date information >
As your timeline grows in size and complexity, you may want more control over how your information is displayed.
Grouping and nesting are two ways to organize and structure your data to make your timeline more useful and easier to manage.
Grouping
Grouping collects related items into separate rows on the timeline, making them easy to identify and compare with other groups.
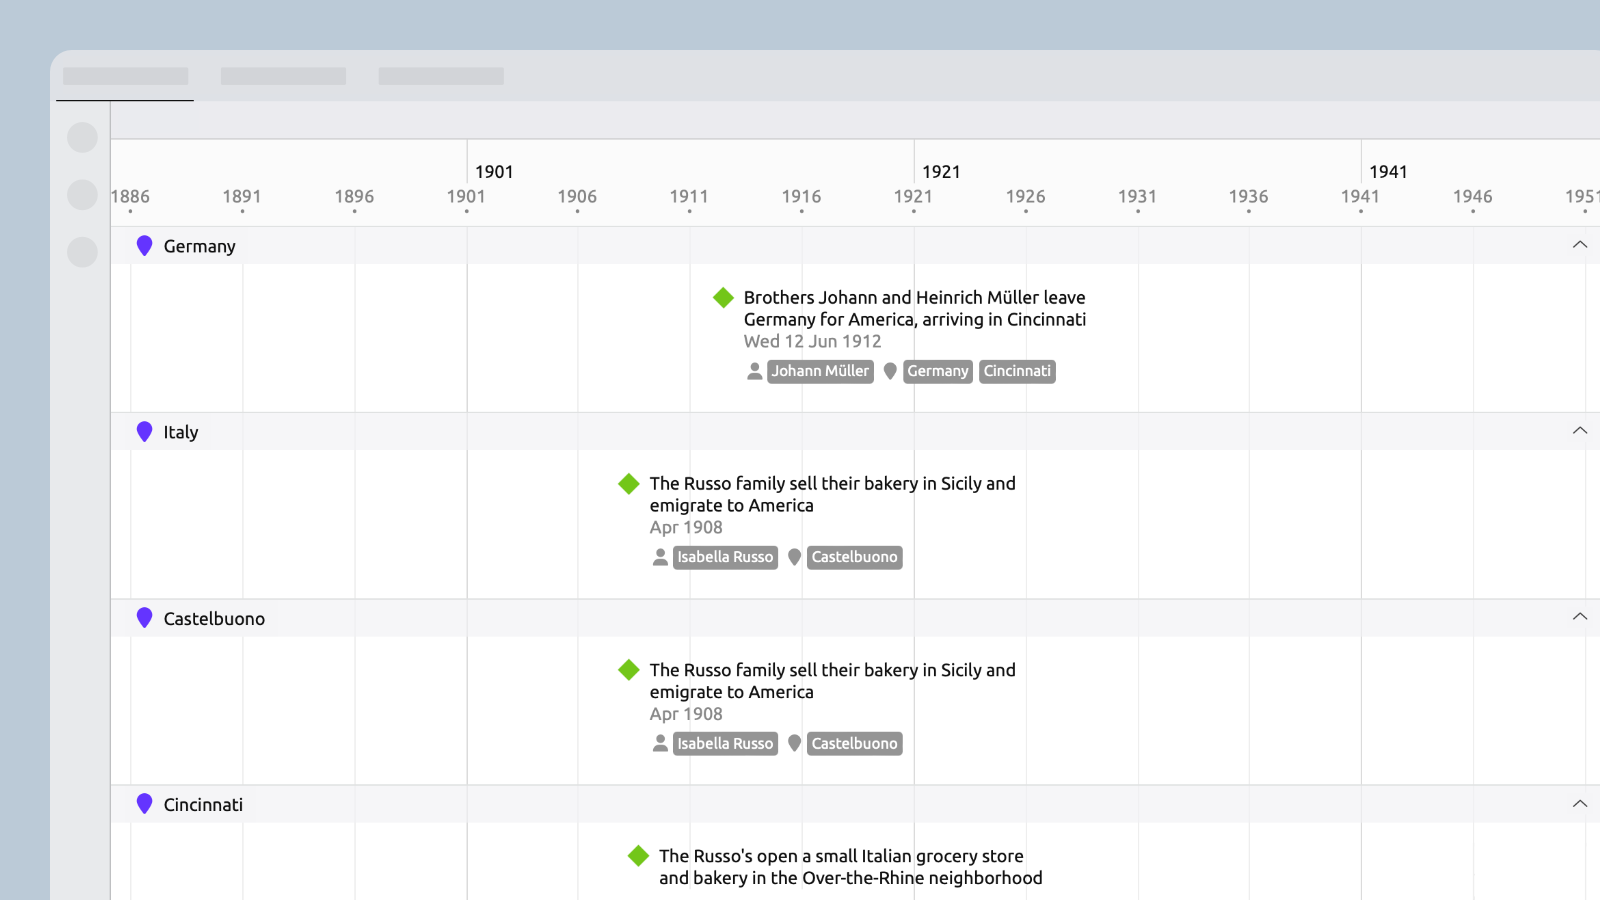
Events can be grouped by type, color, or their relationships with other items.
Events can belong to multiple groups. For example, an event assigned to both Jack and Jill will show in both of their groups.
You can change how your timeline is grouped at any time. For example, you can view tasks grouped by assignee, and then view them grouped by project.
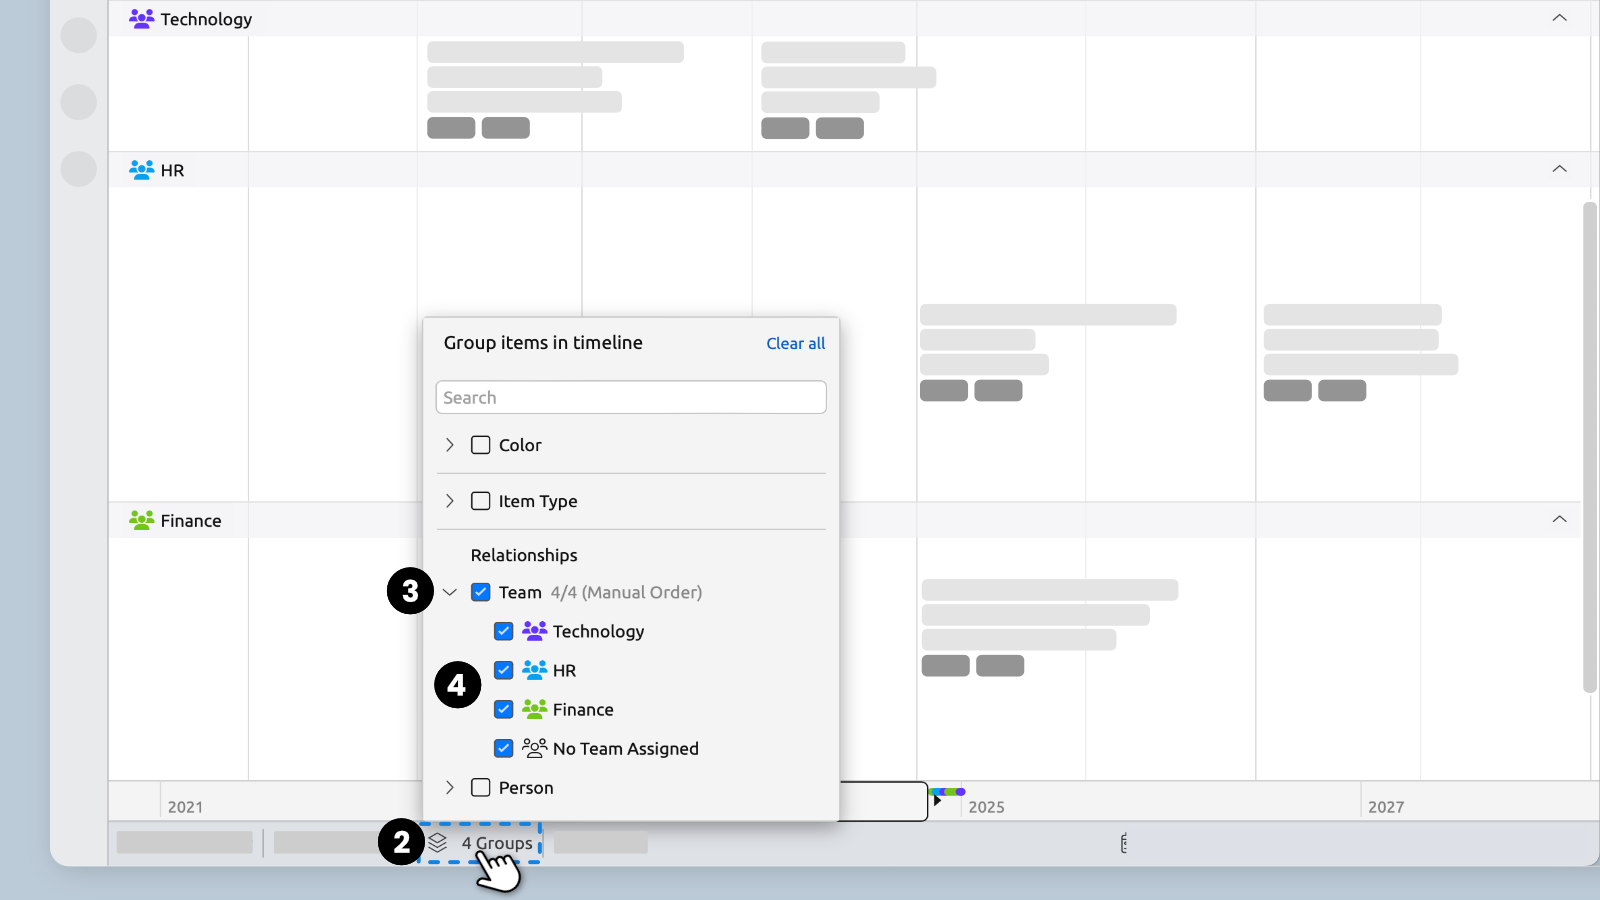
How to Show Groups
- Switch to the timeline view.
- Click theGroupbutton in the view footer.
- Check a top-level box to show groups for all options of that type, or
- Click thearrowto show all options and check only specific ones.
Working with Grouped Events
Add an Event Within a Group

Double-click within a group on the timeline to add a new event in the group.
The new event will automatically be made to match the group.
For example, if creating an event within a group for Jack, the event will automatically be assigned to Jack.
Move Events Between Groups
You can drag events between groups.
If grouped by color or item type, the event will change its color or type.
If grouped by relationship, the event will be added to the second group, but will not automatically be removed from the first.
Remove an Event from a Group
If grouped by relationship, then removing that relationship from an event will also remove it from the group.
- Select the event to open the Inspector.
- In the Relationship panel, find the relationship to the group you want to remove the event from.
- Click theicon and select Remove relationship.

Reorder Groups
You can reorder groups to change their vertical position in the view. How you do this depends on whether your timeline is grouped by item type, relationship, or a combination of both.
Check How Your Timeline is Grouped
In the Timeline footer, click the Group button.
- If Color is checked, those groups will follow the order of your file's colors. You can change that order here
- If Item Types is checked, those groups will follow the order of your file's item types. You can change that order here
- If options under Relationships are checked, those groups will follow the sort order for those related items. You can change that order here
Reorder Colors
- OpenSettings.
- Select the Colors tab.
- In the left-hand list, drag colors into your preferred order.
- Click OK to save and close settings.

Reorder Item Types
- OpenSettings.
- Select the Item Types tab.
- In the left-hand list, drag item types into your preferred order.
- Click OK to save and close settings.

Reorder Related Items
- Open the item type’s panel from the sidebar.
- Drag the items in the list into your preferred order.
- Optional: The panel'ssortoptions let you automatically sort the list by label, color, or date.
The timeline groups will also follow that sorting.

Nesting
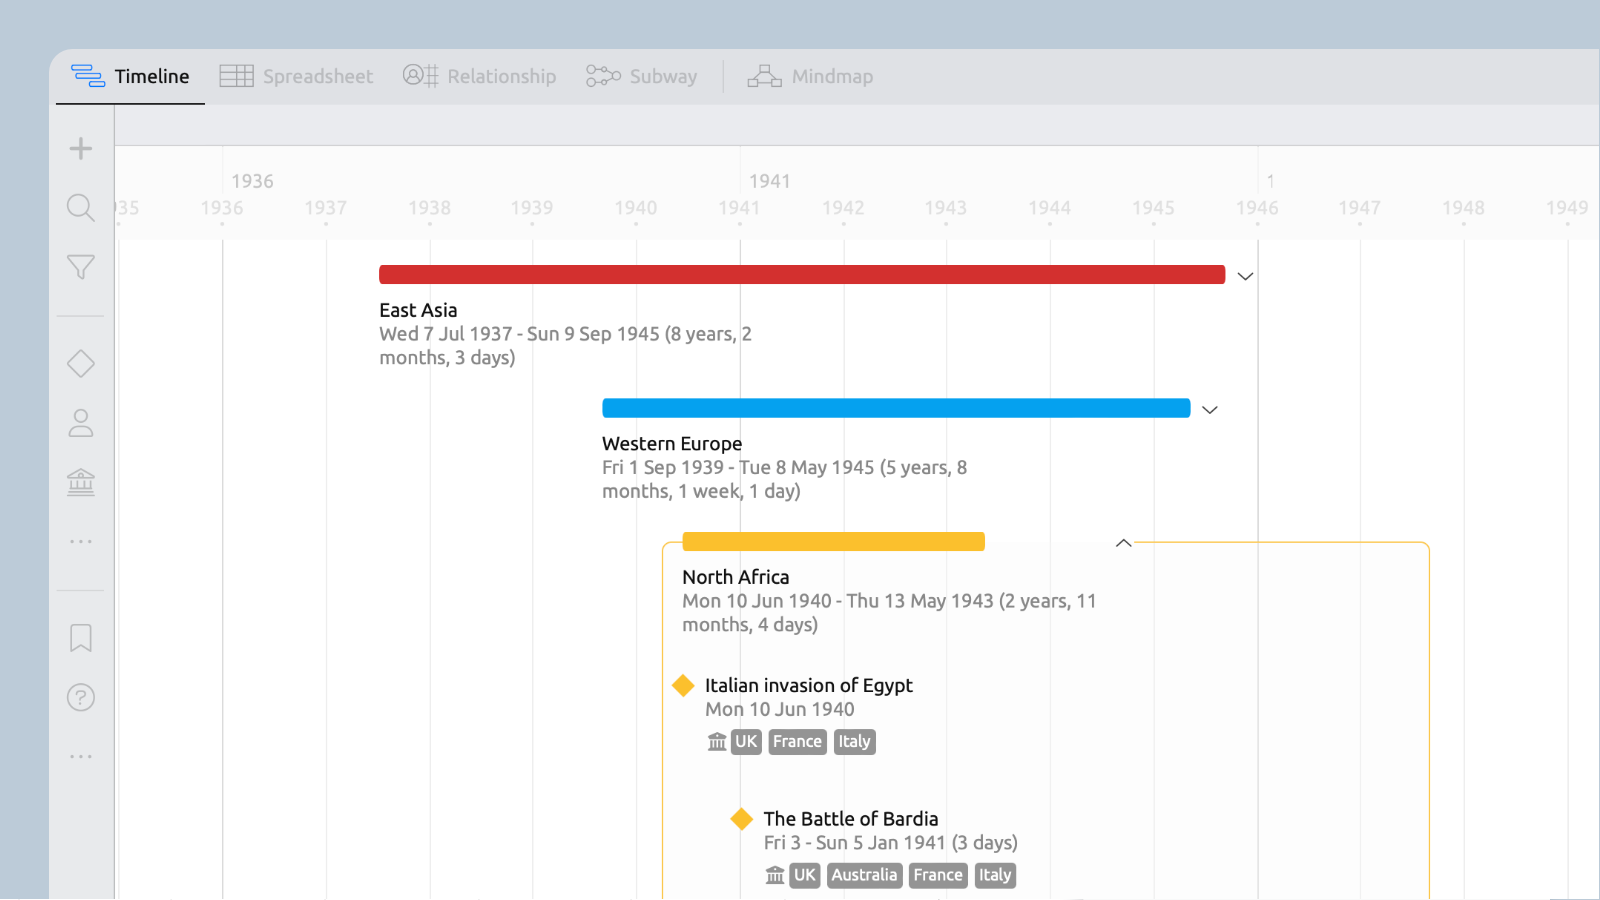
Nest events under a parent to break larger events into smaller, detailed sub-events, like battles in a war or subtasks in a task.
Nesting isn’t just for events. You can also use it to arrange characters into groups, or organize key locations within cities or countries.
Expanding a parent event lets you see the details of its nested children. Collapsing the parent tucks the children out of sight, making it easier to focus on the major events.
Tip: Right-click a parent event for the option to expand or collapse all events in the view.
How to Nest Events
Set a Parent in the Inspector
- Select an event to open the Inspector.
- In the Basic Info section, click the Parent field.
- Choose from a list of possible events.

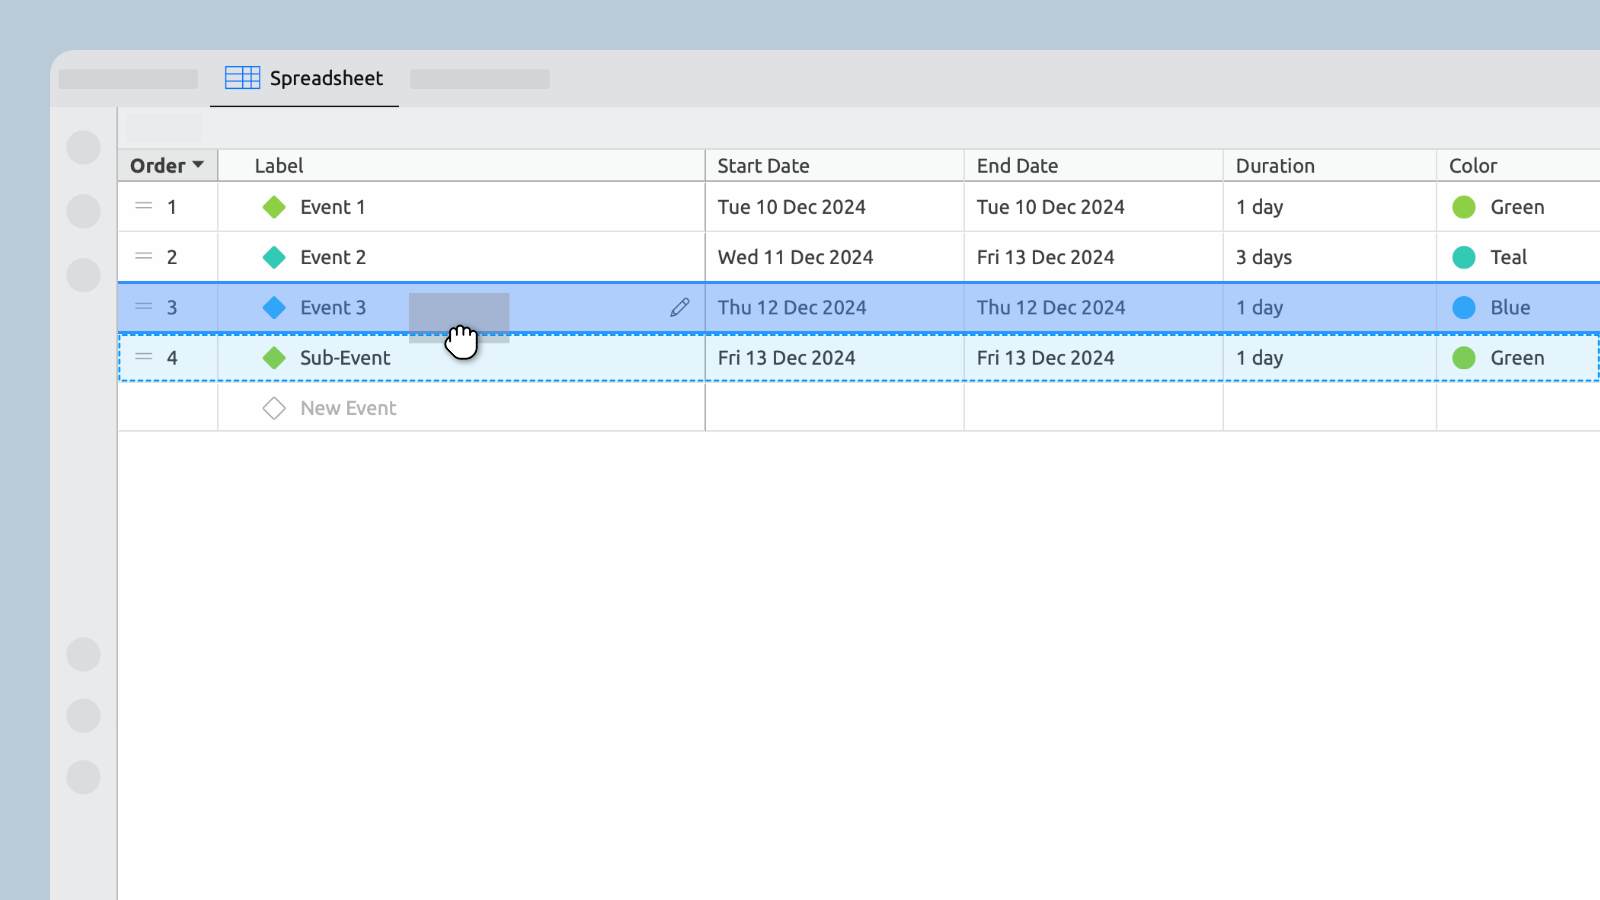
Drag Rows in the Spreadsheet
- A highlighted row means that it will be nested inside that event when released.
- A single blue line means that it will land between the two surrounding events when released.
Hold Cmd/Ctrl and Drag on the Timeline
In Timeline view, hold down the Command (Mac) or Control (Windows) key while dragging to move an event into or out of a parent.
Tip: Right-click an event and choose Create Item to quickly add a parent or child in any view.
Choose What Can Be Nested
You can choose and set which item types can nest under others.
Nesting can be used with items of the same type, for example to organize tasks into sub-tasks. Or, it can also be used across different types, like to organize people into teams.
- OpenSettings

- Select the Item Types tab
- Check that the parent type exists
The left-hand list shows all the item types in your timeline, like Event, Person, Location, etc.
Check that the parent type exists. This means the one that you will nest or organize other information beneath.
If the parent type doesn’t exist, click Add at the bottom of the list to create it. Once added, it will appear in the list, and be available as a parent in the next step.
For example, to nest People inside Teams, check that Team is there.
- Select the child type and set Allowed Parents
Select the child type. This means the one that will be nested inside something else.
Scroll down to Allowed Parent Types, and tick the types that should act as parents.
For example, to nest People inside Teams:
• Select Person as the child type
• Under Allowed Parent Types, tick Team
- Save and close
Click OK to save your changes and close the settings window.
Try Aeon Timeline free for 14 days
Get Aeon Timeline and easily visualize and organize your project.