Story Timelines
Track Story Arcs or Plotlines
In Aeon Timeline, you can connect events to the story arcs or plotlines they belong to. Instead of keeping separate notes or documents about each story arc, everything lives in the same timeline.
This makes it easy to follow each story arc from beginning to end, or see your different story arcs side by side.
What you track is up to you. Whether it’s overarching conflicts, political tensions, or romances, Aeon Timeline helps you keep track of the threads that drive your story forward.

Add and Track Story Arcs
Many starting templates include an item type to track story arcs. To check if your file has this:
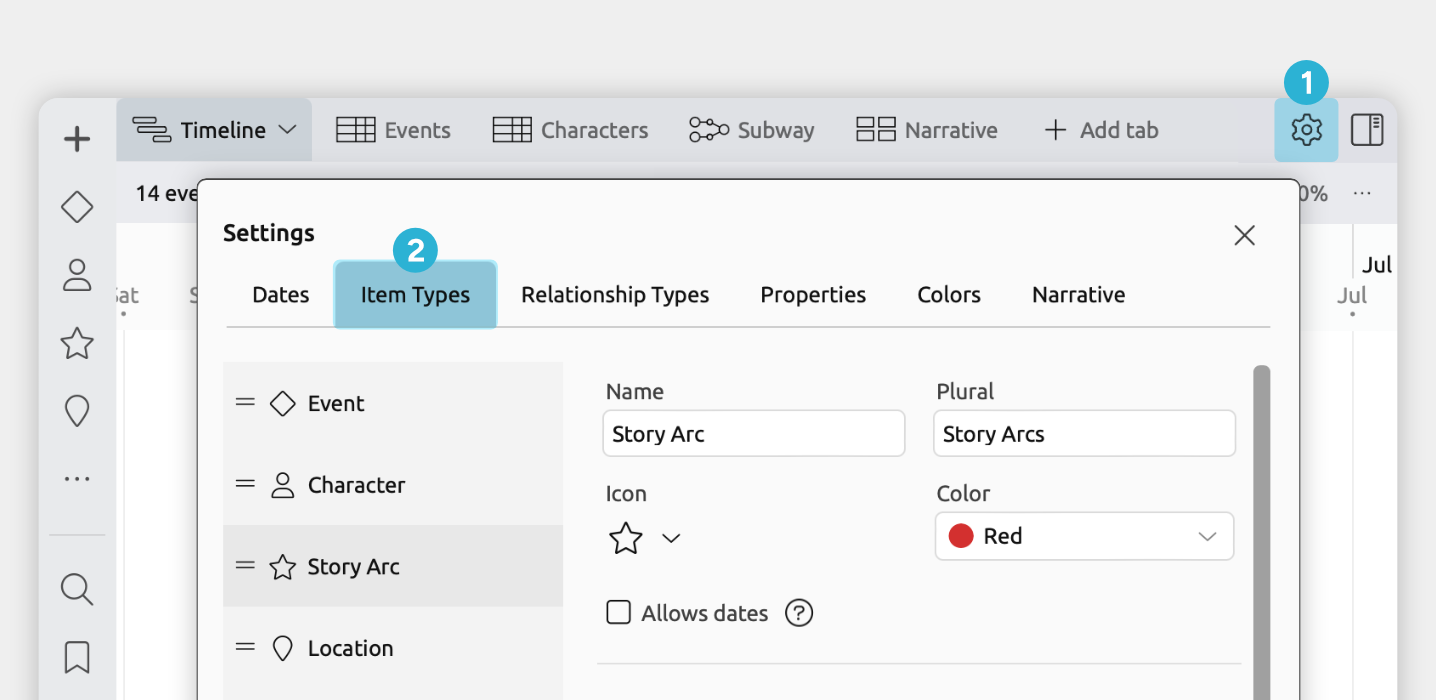
- Open [] Settings.
- Select the Item Types tab.
- In the left-hand list, see if you have a Story Arc item type.
If your file doesn't already track story arcs, you can add it with these steps:
- Open [] Settings.
- Select the Item Types tab.
- Click + New at the bottom of the left-hand list.
- Set the following fields for the new item type:
- Name, plural, and icon
We recommend calling your item type Story Arc / Story Arcs. In this guide, we will use a star icon, but you can pick whichever icon you prefer. - Visibility
Enable Sidebar so you can see and manage your story arcs in a sidebar panel.
Enable Relationship Comparisons so you can easily see and track which events are assigned to which story arcs in the Relationship and Subway views.
- Name, plural, and icon
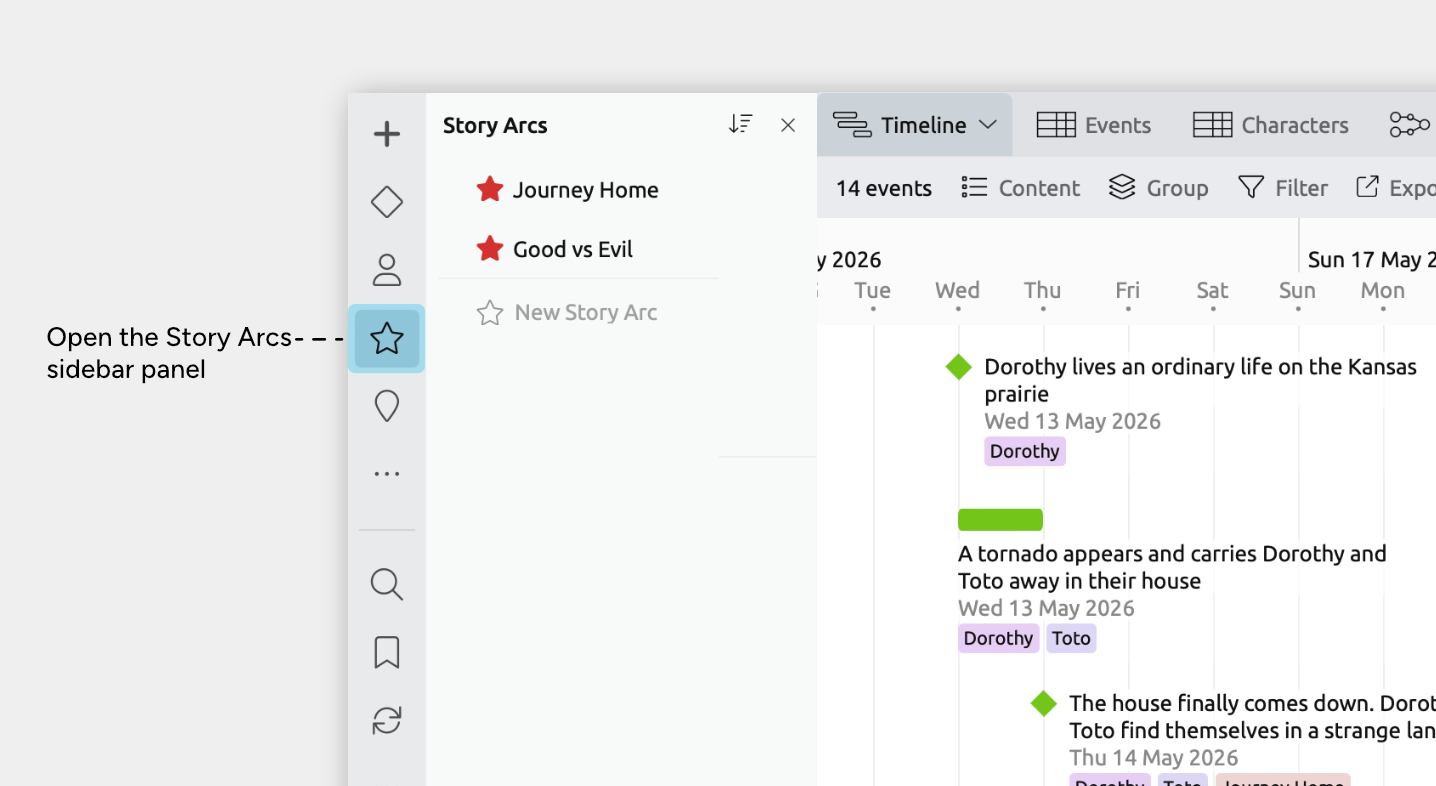
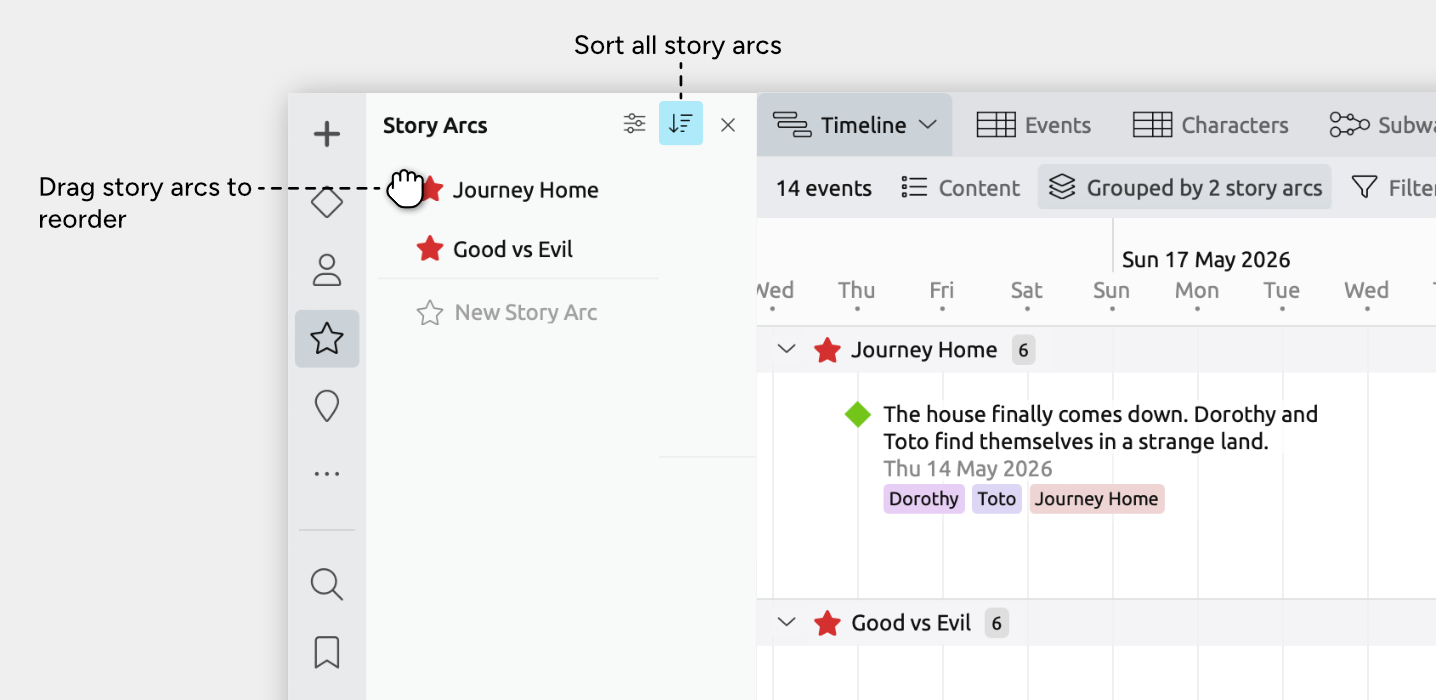
- Click the story arc icon in the sidebar to open the Story Arc panel.
- Focus the New Story Arc input, and type and press enter to create each arc.
- Optionally select each arc to set its color.

Connections between events and story arcs, or other items, are referred to as relationships.
When you select an event or item in any view, the inspector shows all of its relationships in one place.
Add a story arc to an event from the inspector
- Select an event or item.
- In the inspector, find the Story Arc field.
If the field isn’t shown, scroll to the bottom of the inspector and click Add and Edit Fields to add it. - Click Add, then:
- Select an existing story arc, or
- Choose Create to create and link a new story arc.
Once you've connected your story's events to your story arcs, you can show those connections throughout the app in several ways.
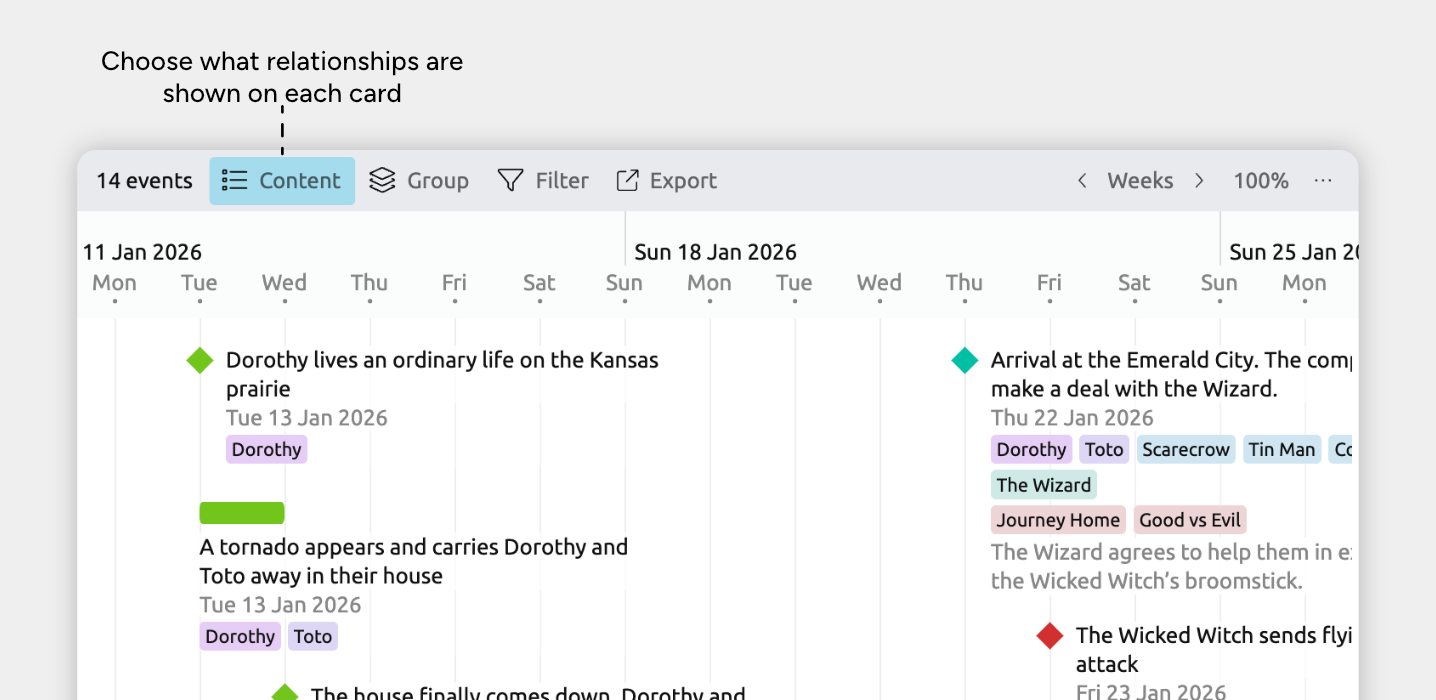
In views that use item cards, you can show related items on each item’s card, so important connections stay visible as you work.
The views that use item cards are:
- Timeline View
- Relationship View rows
- Narrative View
- List View
- Mindmap View
To show relationships on item cards:
- Select or create a tab set to the Timeline, Relationship, List, Mindmap, or Narrative view.
- Open the [] Content panel in the view header.
- Under Fields, enable the Story Arc field.
This may appear under See More, depending on your settings.
You can also show story arcs as:
- Groups in the Timeline view, to see a categorized timeline.
See how in the Categorize and Group Your Timeline by Story Arc section. - Columns in the Spreadsheet or Relationship views.
See how in the Review and Manage Which Events Belong to Which Story Arcs section. - Tracks in the Subway view, to see how story arcs intersect.
See how in the Visualize Converging Story Arcs section.
Categorize and Group Your Timeline by Story Arc
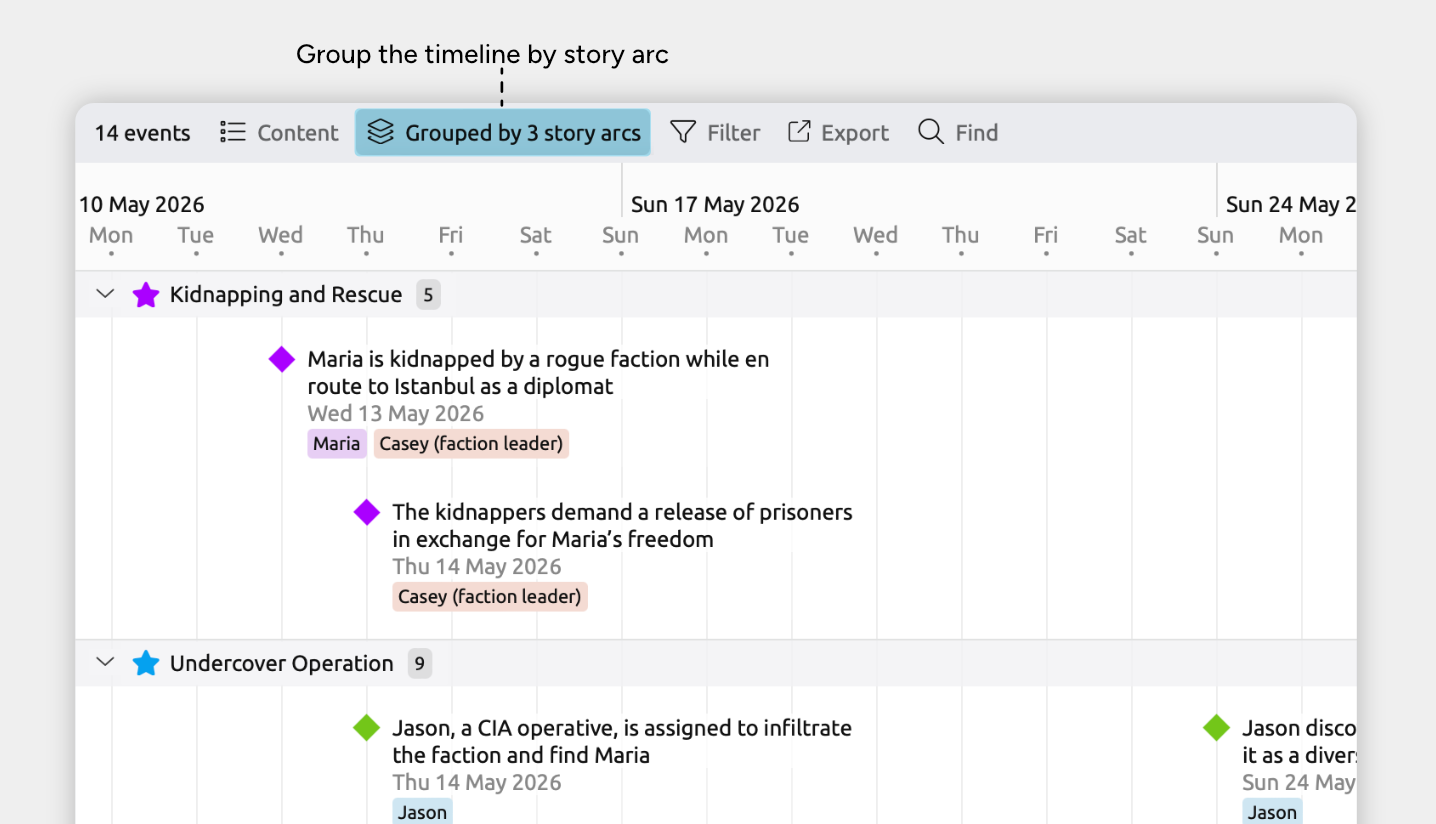
Grouping lets you quickly organize the events and items in a view by story arc.
When you group your timeline by story arc, each arc appears in its own section. This makes it easy to see how each one unfolds over time, compare pacing between arcs, and review how they run alongside each other.
Grouping is available in:
- Timeline view
- Spreadsheet view
- Relationship view
- List view
- Item type sidebar panels
To enable grouping in a view:
- Open the view where you want to use grouping.
- Open the [] Group panel in the view header.
- Find the Story Arc relationship, and expand its section if it is collapsed.
- Select the related story arcs you want to group by, or choose All to show groups for all arcs.
When you group by story arc, the order of the groups follows the order of the related story arcs.
To change how story arcs are ordered:
- Open the Story Arc panel in the sidebar.
- Reorder story arcs by dragging them into your preferred order, or
- Use the panel’s sort options to automatically sort story arcs by label or color.
To learn more about grouping, see the Categorize and Group Events and Items guide.
Review and Manage Which Events Belong to Which Story Arcs
As your story grows, it helps to clearly see which events belong to which arcs.
In the Spreadsheet and Relationship views, you can quickly review and edit the story arcs connected to each event. This makes it easy to check that important events are assigned to the right arcs, and spot arcs that need more development.
Manage Assigned Story Arcs in the Spreadsheet View
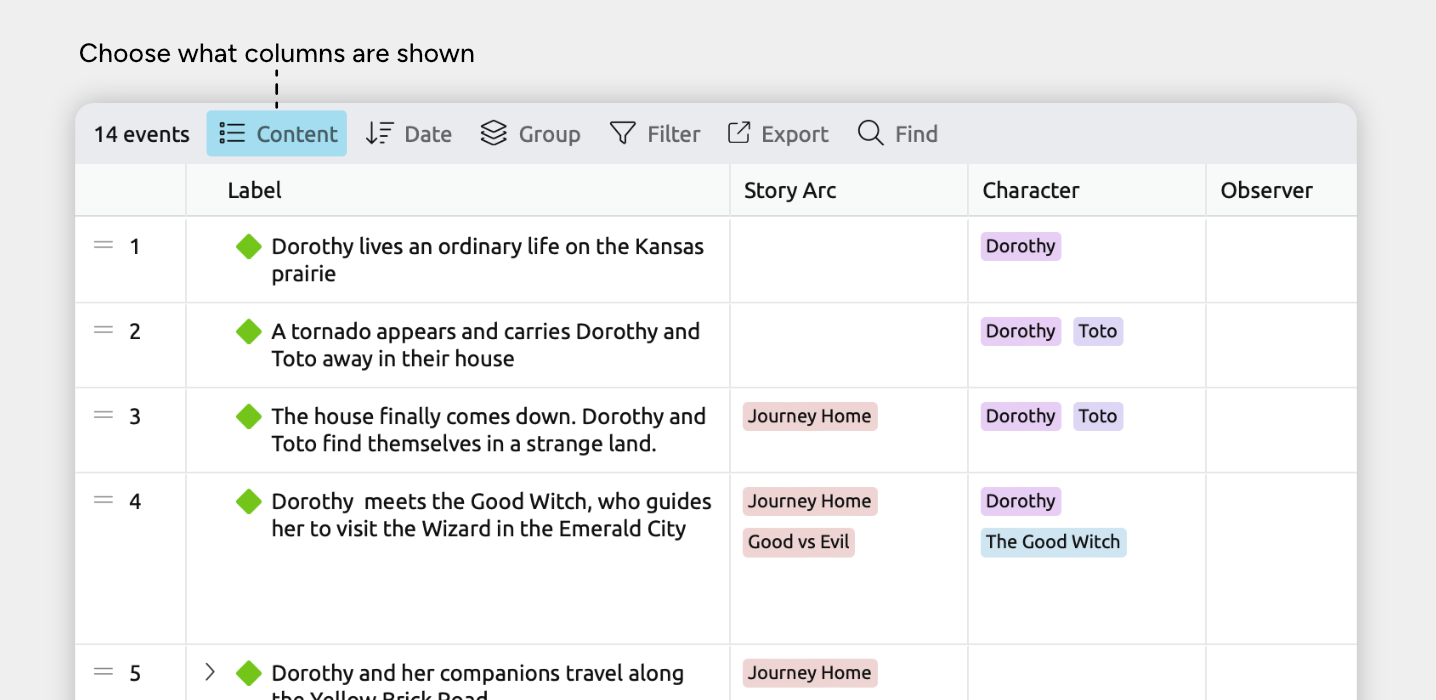
The Spreadsheet view makes it easy to manage relationships in bulk. Relationship types can be shown as columns, so you can quickly link story arcs, or update them for multiple rows.
- Select or create a tab set to the Spreadsheet view.
- Next, set up what the spreadsheet shows:
- Open the [] Content panel in the view header.
- Under Rows, select Events (or any other item type you’re using for your story events).
- Under Columns, select Story Arcs.
- In the spreadsheet, click a cell in the Story Arc column.
- Select an existing story arc to relate, or choose Create to create and link a new story arc.
Select more than one row so you can work with several items at once.
- Hold Cmd (Mac) or Ctrl (Windows) and click the rows’ leftmost gutter cells one by one, or
- Hold Shift and click two row gutter cells to select the range between them.
When multiple events or items are selected, you can change dropdown values in the table for all of them at once, or edit their details together in the inspector.
Note for iOS: Long-press to enter Edit mode, then tap the leftmost gutter cells for the rows you want to select.
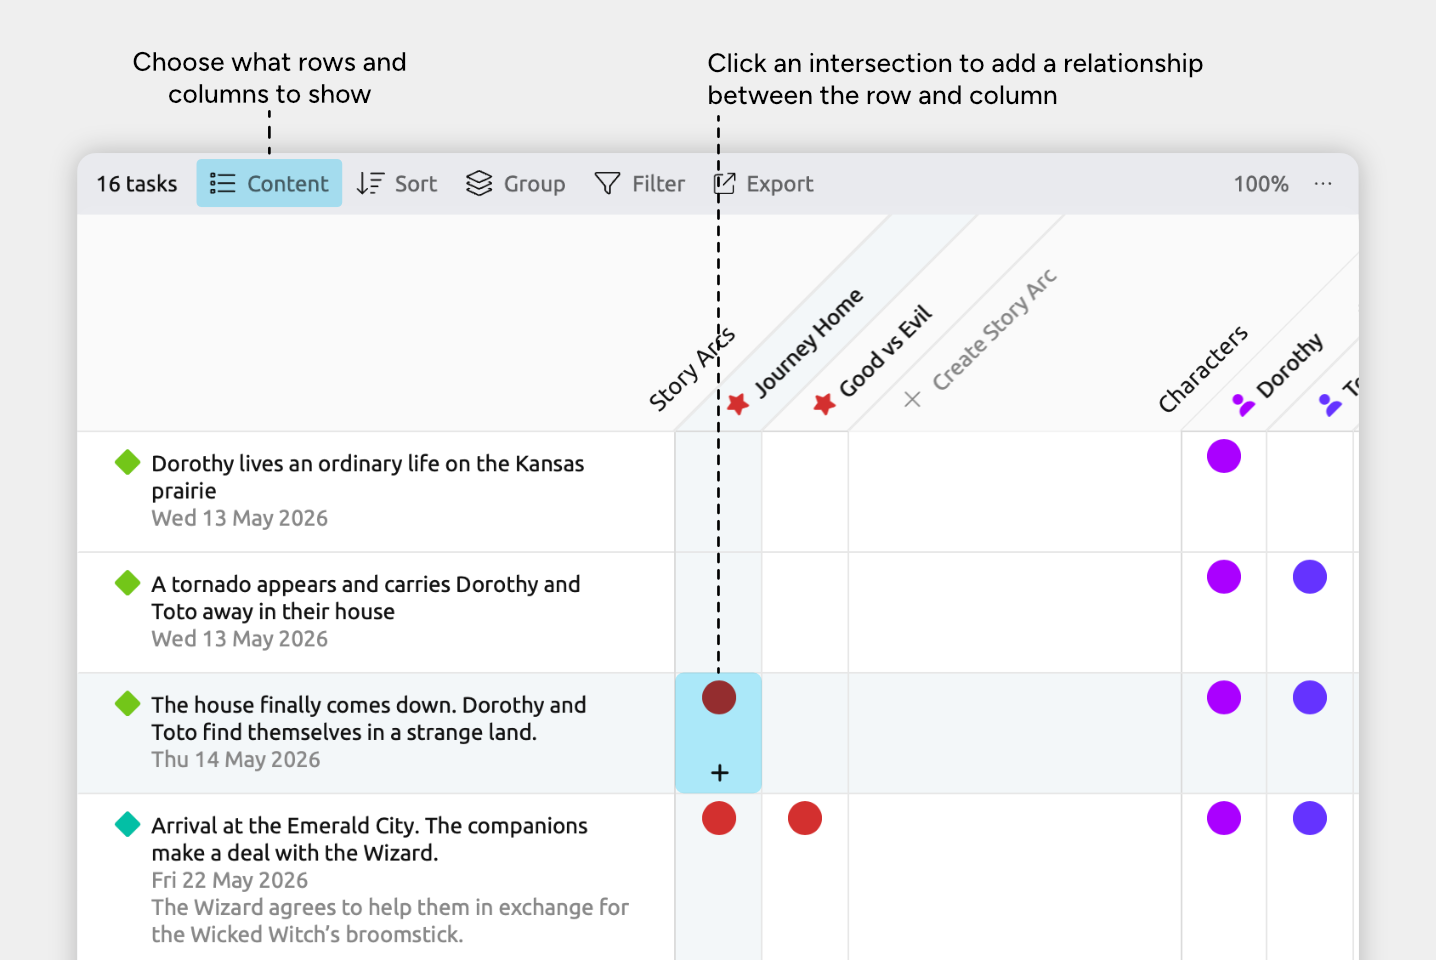
The Relationship view shows connections in a grid, making it easy to explore which events and story arcs link to each other.
- Select or create a tab set to the Relationship view.
- Next, set up what the relationship grid shows:
- Open the [] Content panel in the view header.
- Under Rows, select Events (or any other item type you’re using for your story events).
- Under Columns, select Story Arcs.
- In the grid, click an intersection between an event and a story arc to add or remove the relationship between them.
Learn more in the Relationship View guide.
Visualize Converging Story Arcs
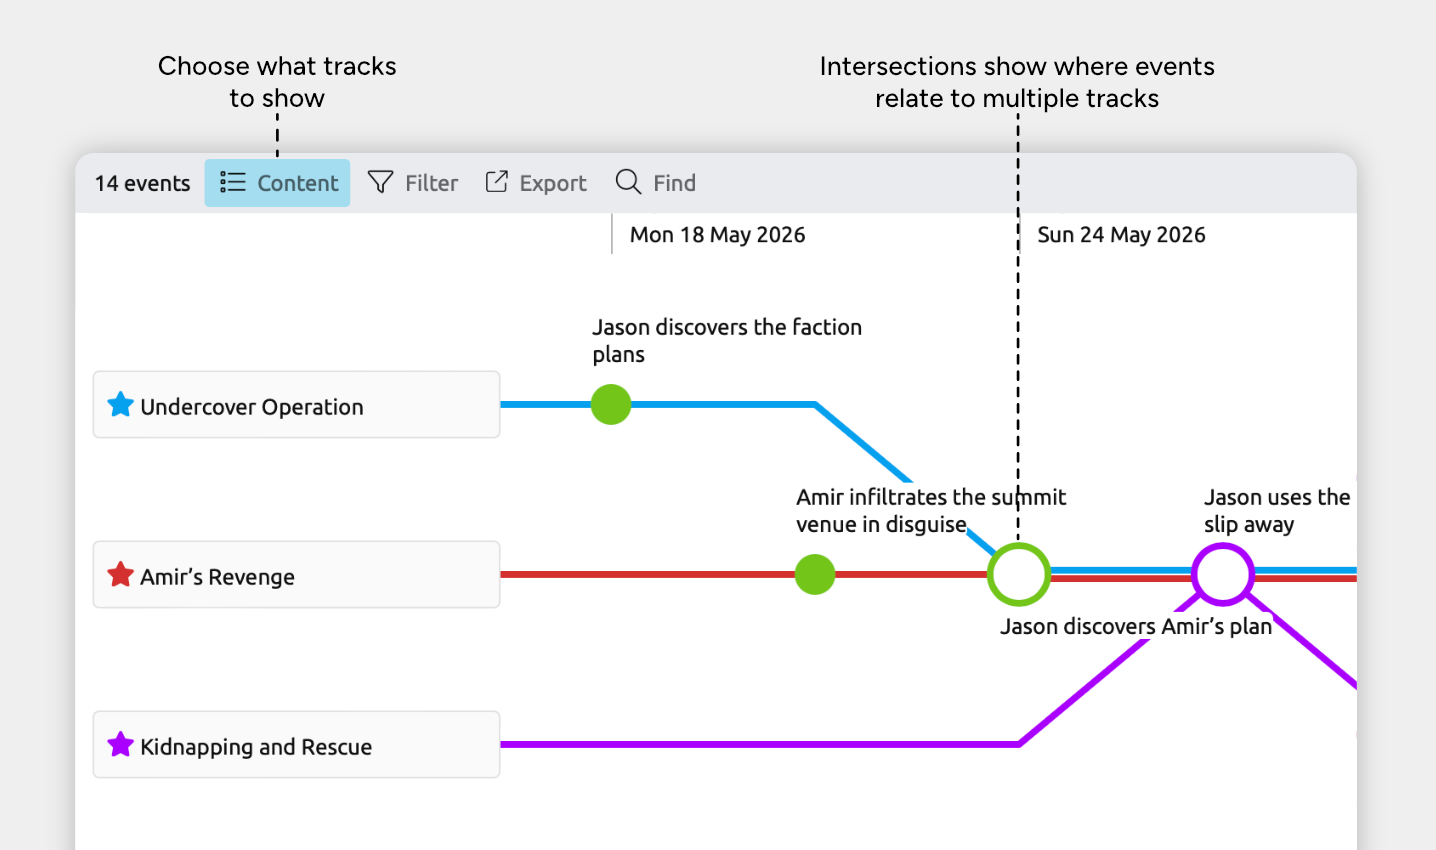
The Subway view lets you see how different story arcs run in parallel, and where they overlap.
Each horizontal track represents a single story arc. Events appear as nodes along that track. When the same event belongs to multiple arcs, the tracks intersect, making those shared moments easy to spot.
This gives you a clear visual of how your plotlines connect, and where key events bring multiple threads together.
Tip: To see an example of visualizing story arcs in the Subway view, explore the Multiple Story Arcs template in the app.
Tracks are the main lines shown in the view. To show your story arcs and events in the Subway view:
- Select or create a tab set to the Subway view.
- To show tracks for your story arcs:
- Open the [] Content panel in the view header.
- Under Tracks, select Story Arcs. Or, use the Story Arcs dropdown to select individual arcs.
- To show your events on each track:
- Open the [] Content panel in the view header.
- Under Nodes, select Events
Learn more about customizing the view in the Subway View guide.
Note for narrative views: If you’re using a subway view set to show the narrative (shown by the Narrative label in the view header), the nodes will always be based on your narrative structure and can’t be customized per view. Learn more in the Organize a Separate Story Structure guide.
Try Aeon Timeline free for 14 days
Get Aeon Timeline and easily visualize and organize your project.