Getting Started
Welcome! This guide will help you create your first timeline, understand the interface, and start adding events, people, places, and more. Aeon Timeline is flexible: whether you're mapping out a novel, planning a project, or tracking historical research, you can tailor your file to match the way you work.
Choosing a Template
When you begin a new file, you’ll start by choosing a template.
Templates are simply starting points. They include example views, with starting categories of things your timeline can record.
- A story template might include Events, Characters, and Story Arcs.
- A project template might include Tasks, Milestones, and Teams.
- A historical template might include Events, People, and Sources.
No matter what you choose, you’re never locked in. You can fully customize your file later, changing what information it tracks and how it’s shown.
Note: The screenshots in this guide use the Story Timeline template as an example. The interface works the same way for every template, though the sample data may be different.
Interface Basics
Across the top and sides of Aeon Timeline, you’ll find tools to navigate, view, and edit your data.
Tab Bar
Aeon Timeline includes multiple view types, such as Timeline, Spreadsheet, and List views. Each view shows your timeline data in a different way.
Views don’t create separate copies of your data. They all work with the same events and items, which means:
- The same events and items can appear in more than one view
- Changes you make in one view are reflected everywhere
The tab bar lets you keep multiple views open at the same time and switch between them easily.
You can use tabs to:
- View different data
For example, a spreadsheet of Events, and a spreadsheet of Characters. - View the same data in different ways
For example, a Timeline of Events, and a Spreadsheet of Events. - Keep frequently used combinations open for easy access
Switch between tabs anytime without losing your place.
Learn more about tabs and views →
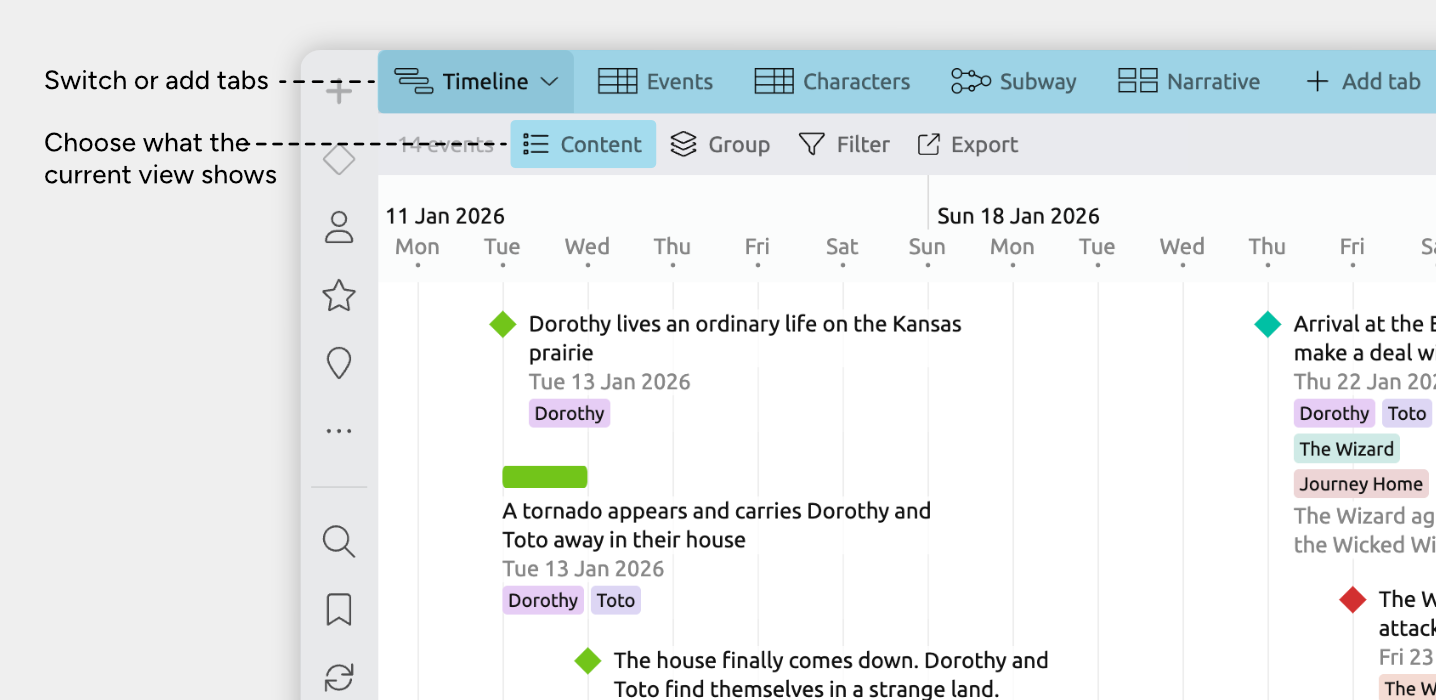
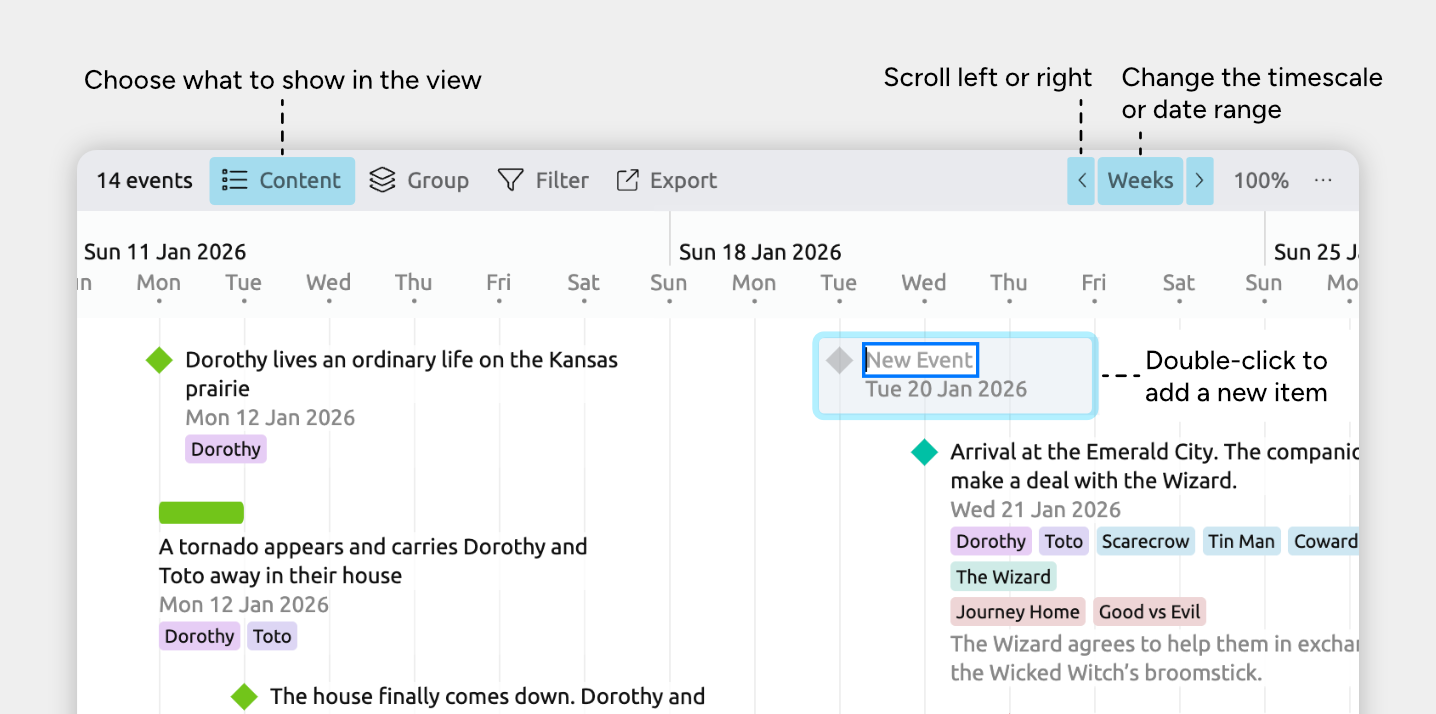
The Timeline View
The Timeline view lays your items out across time, from left to right, so you can see when things happen and how they’re ordered.
Select a tab that’s set to show the Timeline view. If you don’t have one, click + Add Tab and choose Timeline to create one.
Tip: Press ⌘J (Mac) or Ctrl+J (Windows) to quickly scroll the timeline to a specific date.
Learn more about the Timeline view →
The Inspector
When you select an event or item in Aeon Timeline, its details appear in the inspector, where you can view and edit them.
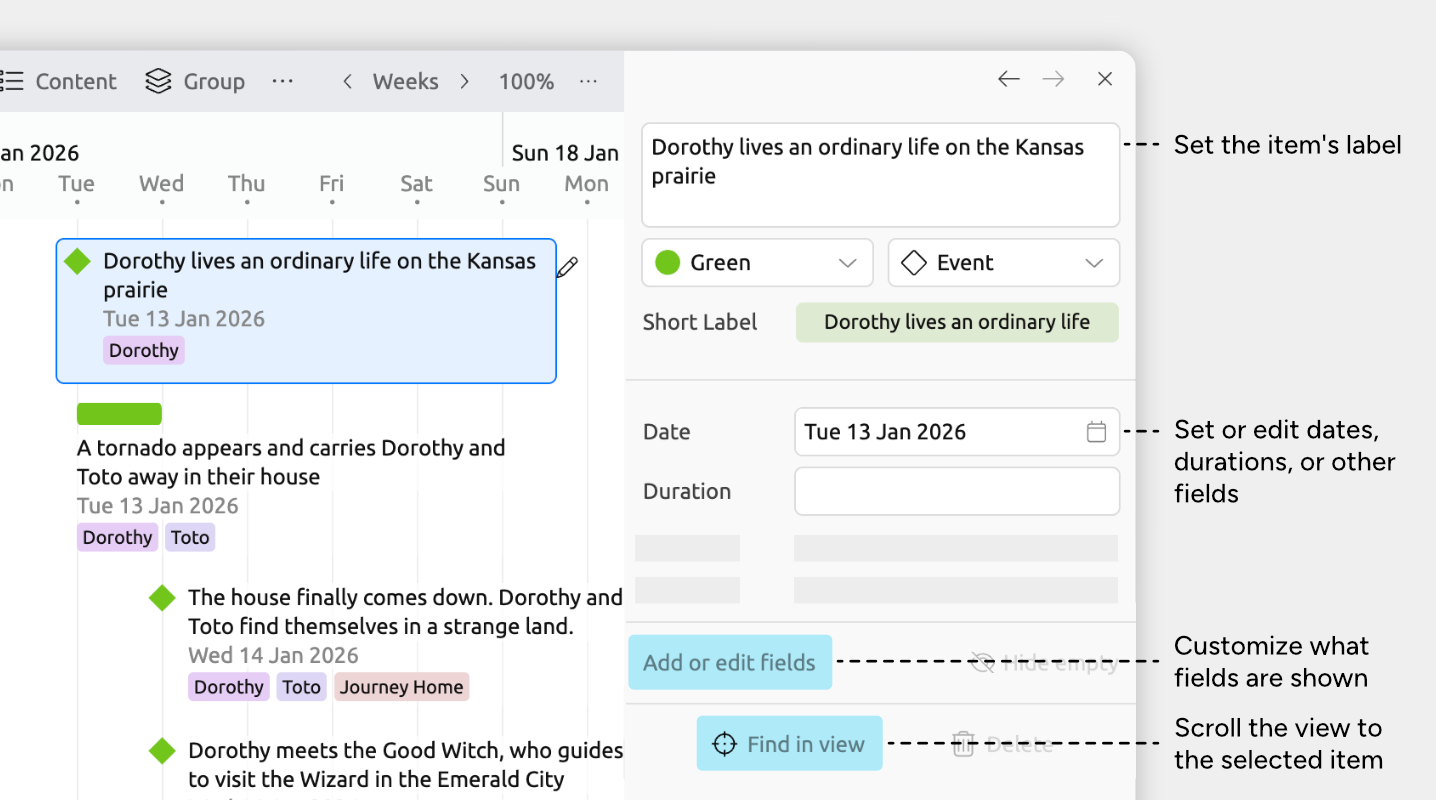
This keeps all the details for the selected item in one place, no matter which view you’re working in.
The fields shown in the inspector depend on the selected item’s type. You can customize them by clicking Add or Edit Fields at the bottom of the inspector.
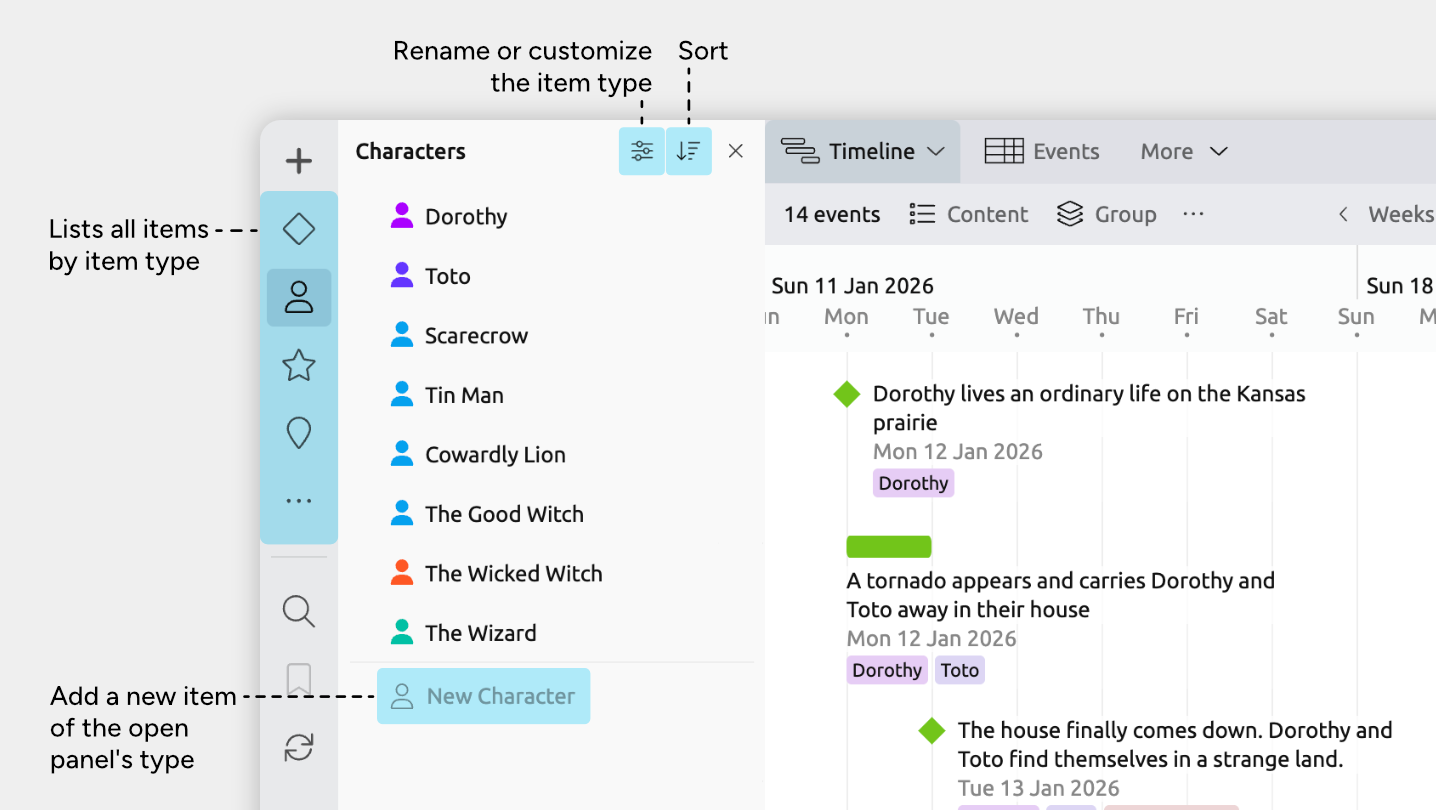
Item Type Sidebar Panels
Item types are the categories of things you track in your project, such as Events, People, Places, Sources, Tasks, or any custom types you create.
Each item type in your file can have its own panel in the sidebar.
Within each panel, you can view and edit all items of that type, and quickly add new ones as your project grows.
In the example below, you can see panels for Events, c, Story Arcs, and Locations — the item types included in the Story Timeline template.
Where to Next?
Explore the Different Views
Different views let you focus on different tasks. Visualize timing on the timeline, bulk-edit information in a spreadsheet, or review your work in a list.
Connect Events, People, and More
Link people, events, places, and other items to show how they’re connected. Relationships make it easier to track who was involved in an event, how events influence each other, or how different parts of your project fit together.
Try Aeon Timeline free for 14 days
Get Aeon Timeline and easily visualize and organize your project.