The Timeline View
The Timeline view lays your events and items out across time, from left to right, so you can see when things happen, how long they last, and how they line up.
Customize Content
You can control what appears on the timeline. You can choose what item types are shown, as well as what details are shown for each event or item.
- Choose which item types are shown (for example, Events, People, or Tasks).
- Decide what details appear on each bar or card, such as dates, notes, or tags.
- Choose the date range to focus on.
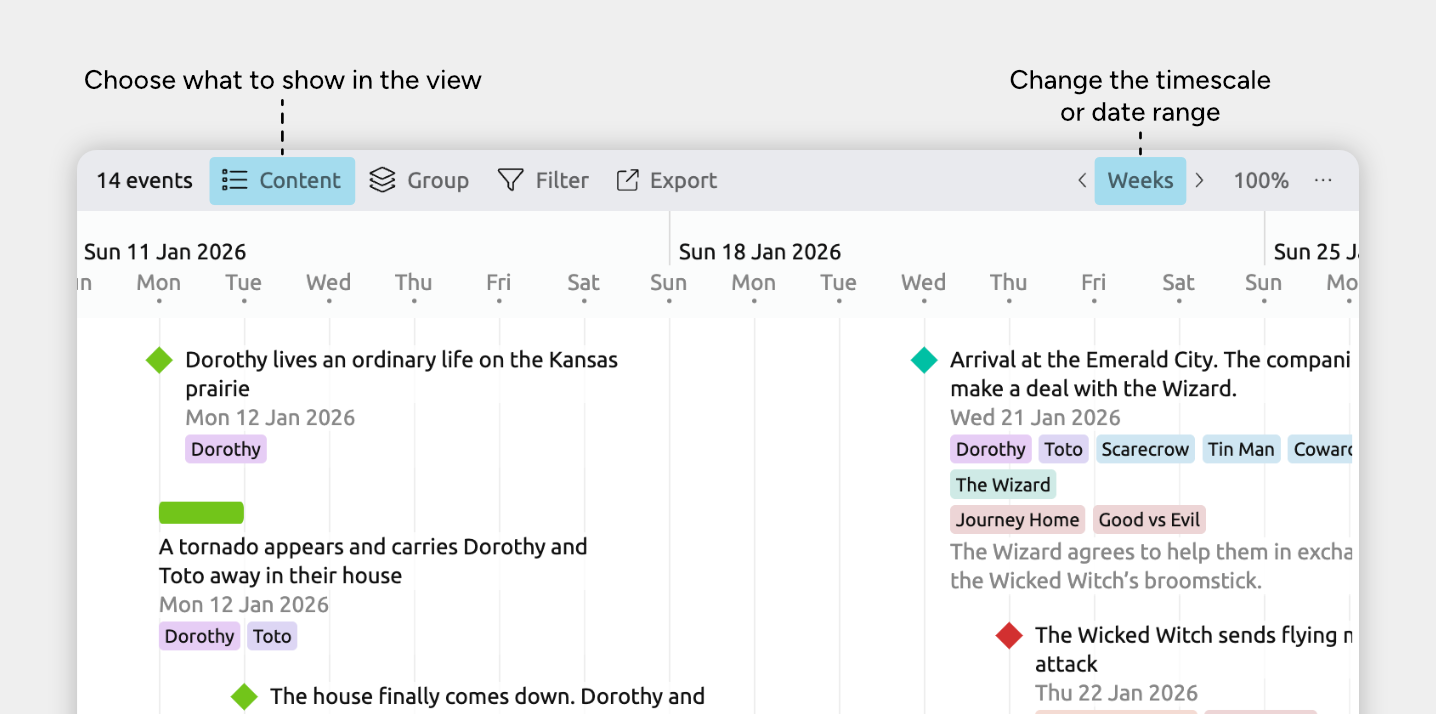
Choose Which Item Types to Show
- Open the Content panel in the view header.
- Under Cards, check or uncheck the item types you want to show or hide.
Only item types that support dates will be available, since the Timeline view displays items positioned in time.
Customize Card Details
- Open the Content panel in the view header.
- Under Fields, click fields to show or hide them on timeline cards.
- Click Card Options for more display settings, including:
- Limit the lines of text per card.
- Whether to draw dependencies as lines on the timeline.
- Choose between showing markers only or full cards.
- Adjust how items are laid out to make the timeline more compact or more expanded.
Set the Timescale and Date Range
You can adjust the timeline’s timescale at any time to zoom in for detail or zoom out for a broader overview. You can zoom in to work with precise dates, or zoom out to view months, years, or longer spans.
You can also limit the visible date range to focus on a specific time period.
If you want to change the underlying calendar or date system used by your entire project, see Add and Customize Dates →
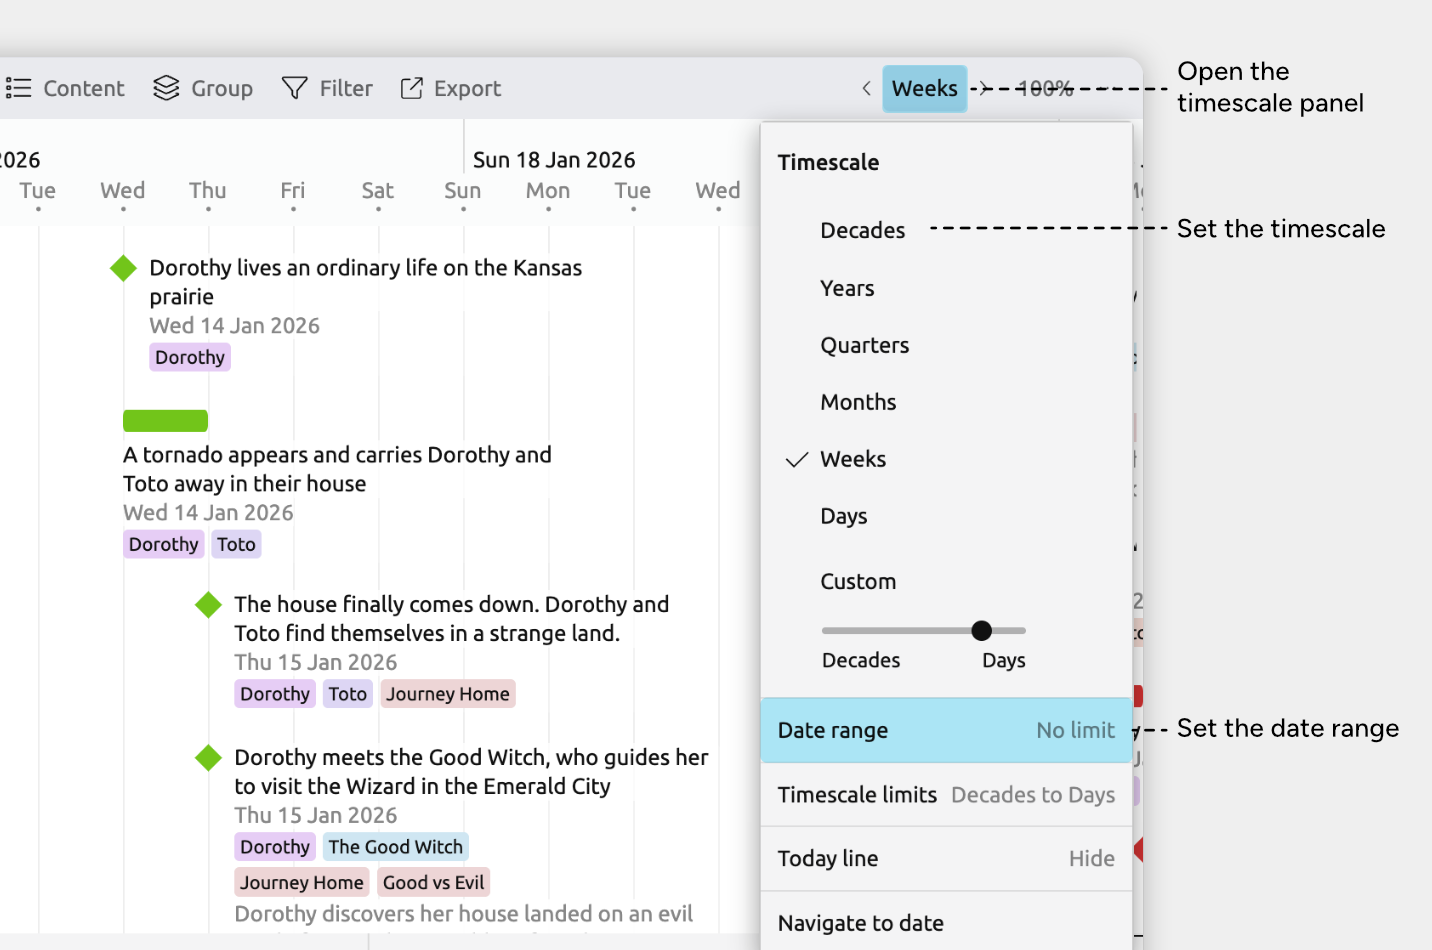
Set the Timescale
To choose a specific timescale:
- Open the Timescale panel in the view header. It’s labelled with the current timescale, such as Years, Months, or Custom Timescale.
- Select one of the preset scales (such as Decades or Years), or adjust the slider under Custom Timescale.
You can also zoom the timeline using scrolling or gestures:
- Hold Cmd (macOS) or Ctrl (Windows) and scroll with the mouse; or
- Use a pinch gesture on a trackpad or touchscreen.
Set Timescale Limits
How far you can zoom in or out is controlled by the timescale limits.
To change these limits:
- Open the Timescale panel in the view header. It’s labelled with the current timescale, such as Years, Months, or Custom Timescale.
- Select Timescale Limits.
- Set the minimum and maximum zoom levels.
This ensures that zooming only allows timescale levels that are appropriate for your work.
Set the Date Range
You can limit the visible date range of the timeline to focus on a specific period.
To set a date range:
- Open the Timescale panel in the view header. It’s labelled with the current timescale, such as Years, Months, or Custom Timescale.
- Select Date Range.
- Enter dates in the From and To fields, or clear them to allow the timeline to scroll infinitely.
Navigate the Timeline
Scroll Horizontally Through Time
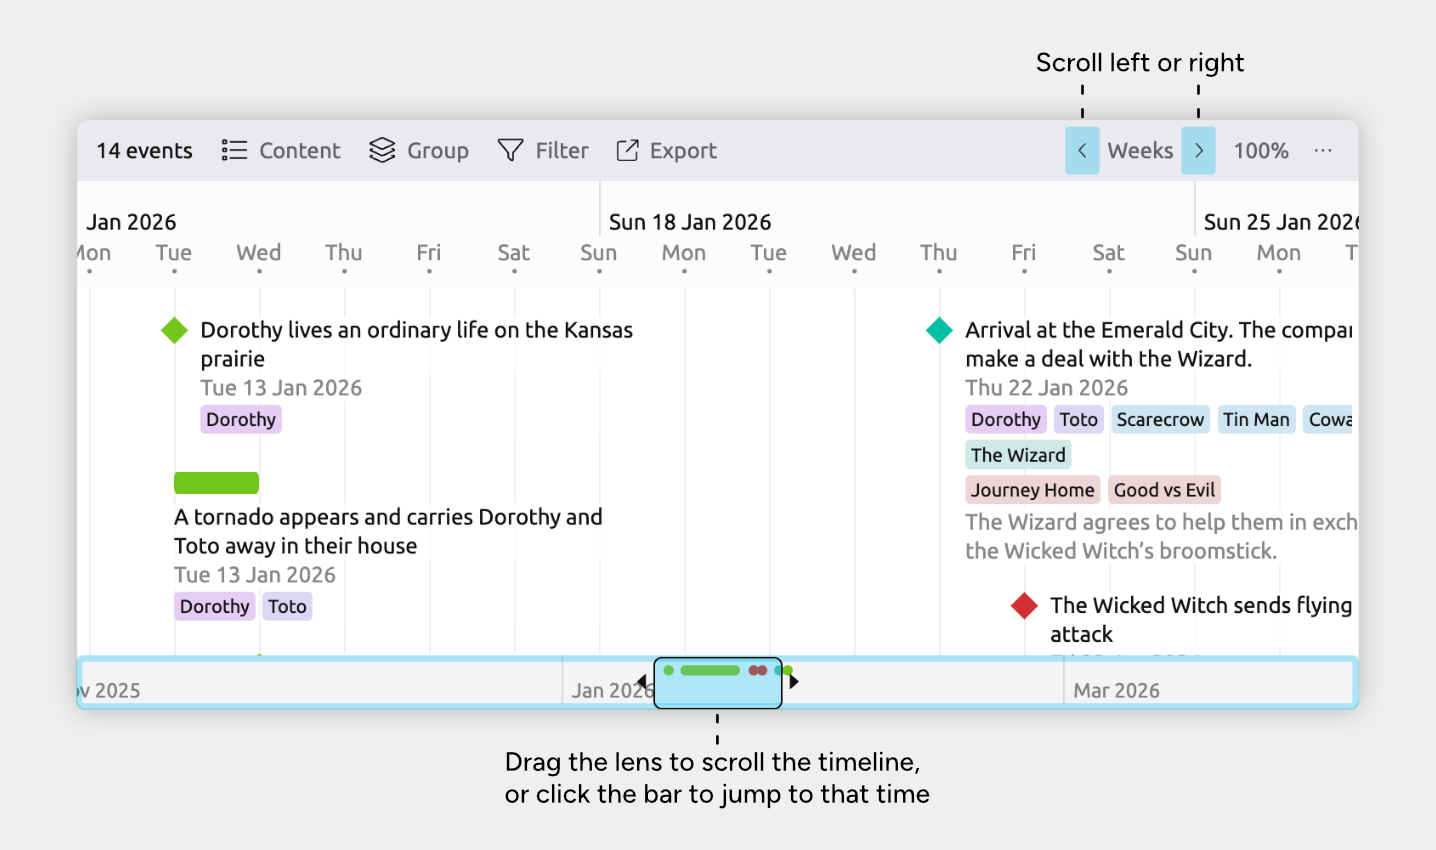
There are several ways to move left and right through the timeline.
From the interface:
- Click the left and right arrow buttons in the view header to move left or right by a screen’s width.
- The context bar shows a condensed overview of the timeline and lets you jump quickly to a different point in time. Click in the context bar to jump to that part of the timeline.
Using a mouse, trackpad, or touchscreen:
- Hold Shift and scroll with the mouse
- Swipe left or right on a trackpad or touchscreen
Jump to Dates
- Open the Timescale panel in the view header. It’s labelled with the current timescale, such as Years, Months, or Custom Timescale.
- Open the Navigate to date section.
- Select to scroll to a date that you input, or to today.
Tip: You can also press Cmd + J (Mac) or Ctrl + J (Windows) to quickly open the Scroll to date panel.
Jump to Events or Items
You can jump straight to a specific event or item on the timeline.
- Select the event or item you want to find.
- You can do this by searching: click the Search icon in the sidebar and enter text that matches the item.
- At the bottom of the inspector, click Find in view.
The timeline will scroll to that event or item and bring it into focus.
Tip: Once you have selected an event or item, you can also press Cmd + G (Mac) or Ctrl + G (Windows) to scroll to it in the view.
Add Events and Items
You can add new events and items directly on the timeline.
Events and items created in other views will also appear here, as long as they have dates and their item types are set to be shown.
Add a New Event or Item
Add directly on the timeline:
- Double-click an empty space on the timeline to create a new item at that date.
- If multiple item types are available, use the Choose type dropdown to select the one you want.
- Type a label and press Enter.
Add from the sidebar:
- Click the + button in the sidebar.
- Select an item type.
- Type a label and press Enter.
Duplicate an Existing Item
- Click an event or item’s pencil icon to open its Edit menu.
- On Mac or Windows, hover over the item to show the icon.
- On iOS, tap the item once to show the icon.
- Choose Duplicate.
Create an Item Directly Above or Below Another
- Click an event or item’s pencil icon to open its Edit menu.
- On Mac or Windows, hover over the item to show the icon.
- On iOS, tap the item once to show the icon.
- Choose Create item above or Create item below.
Set and Adjust Dates
You can drag events and items in the timeline to adjust their dates.
If you prefer to more precisely adjust dates, you can also select an event or item and edit its dates in the inspector.
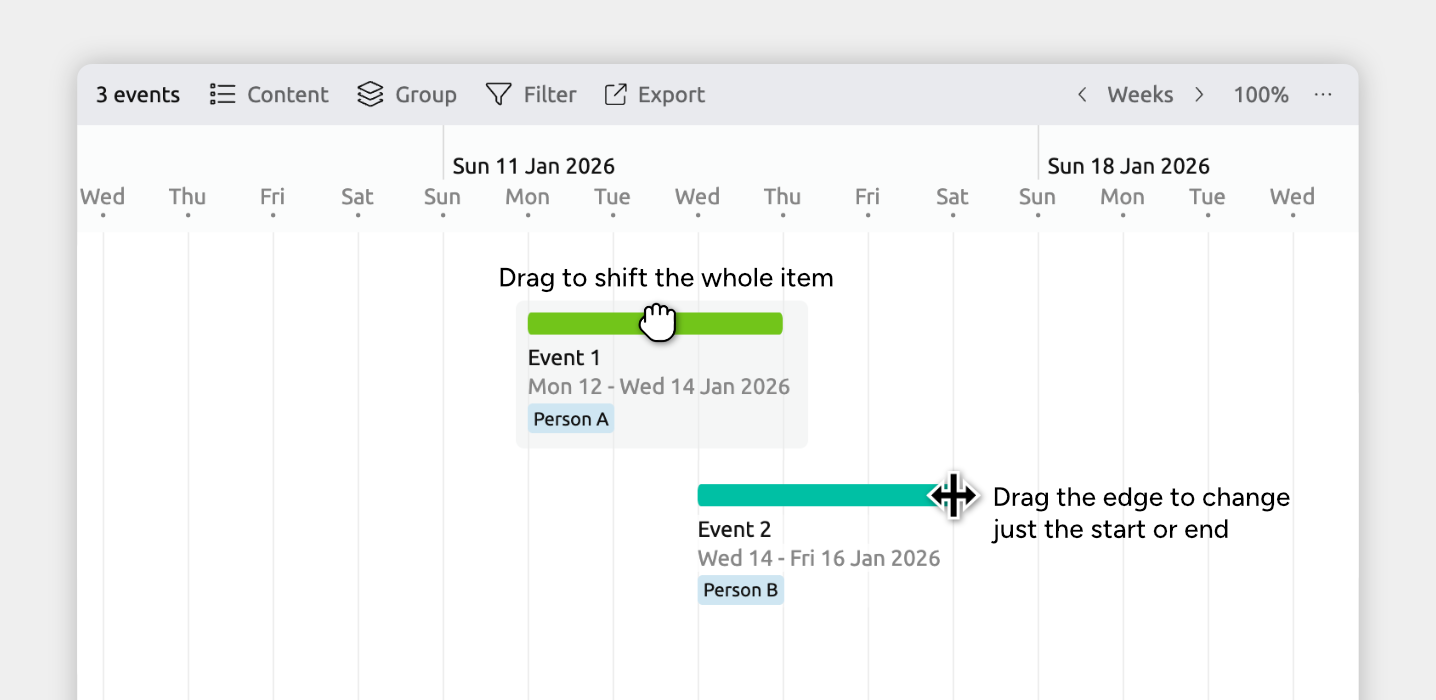
Shift an Entire Event or Item
Drag an event or item left or right on the timeline to move it through time without changing its duration.
- Hold Shift while dragging to move by set increments (such as 1 hour or 1 day), based on your current timescale zoom.
- If the item contains nested items, they may move automatically as well depending on your date editing settings. Learn more about date editing behaviors →
- Note for iOS: Long-press to enter Edit mode before dragging events and items.
Shift an Item’s Start or End
Adjust when an event or item begins or ends by resizing it on the timeline.
- Hover over the left or right edge of the marker until the resize arrows appear, then drag inward or outward.
- Hold Shift while dragging to move by set increments (such as 1 hour or 1 day), based on your current timescale zoom.
- Note for iOS: Dragging marker edges isn’t available. To change start or end dates, select the item and edit its dates in the inspector.
Group Events and Items
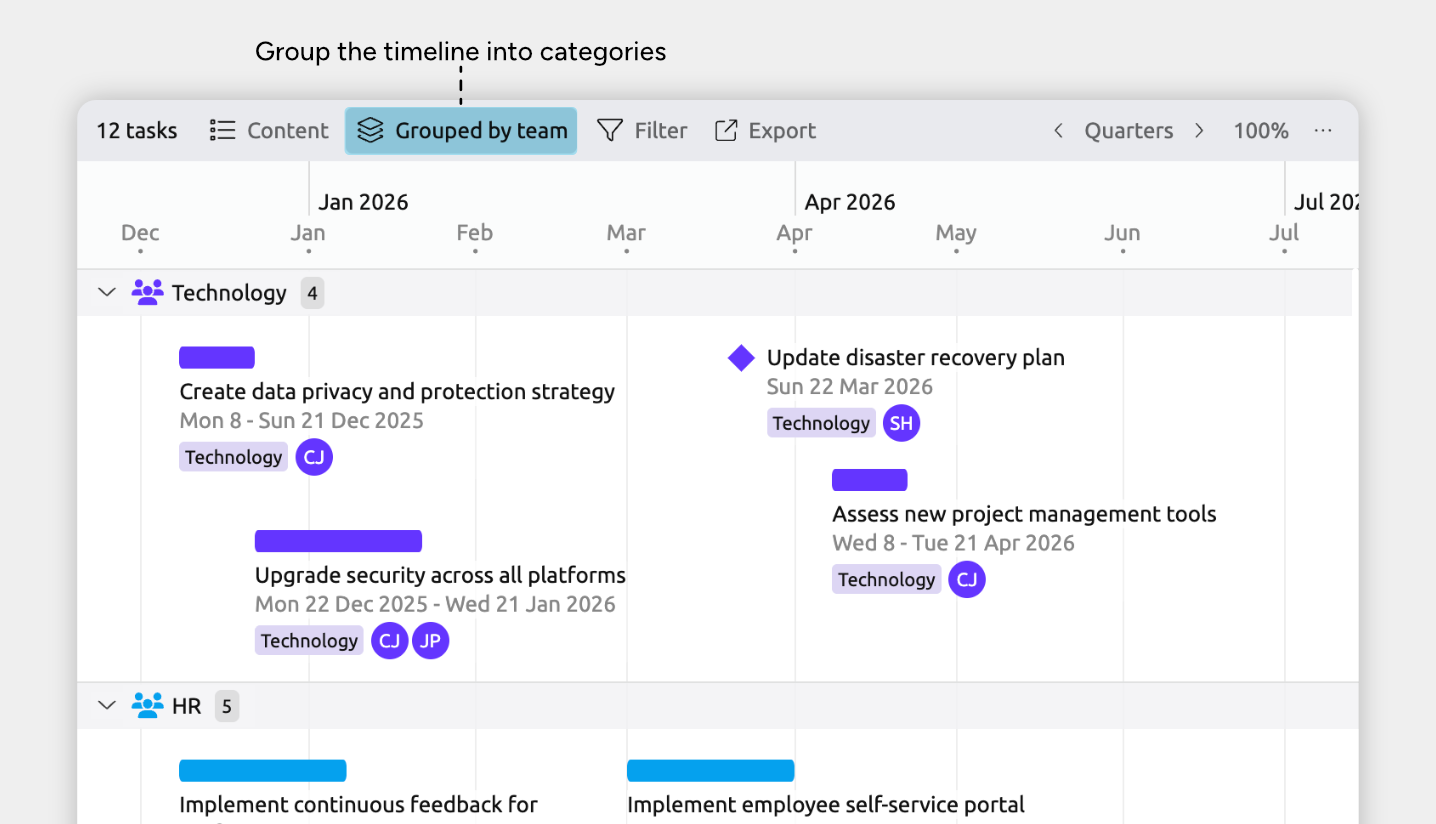
Grouping organizes related events and items into their own rows on the timeline. This makes it easier to focus on specific subsets of your data, or compare groups side by side.
Enable grouping from the Group panel in the view header.
Nest Items to Create Hierarchies
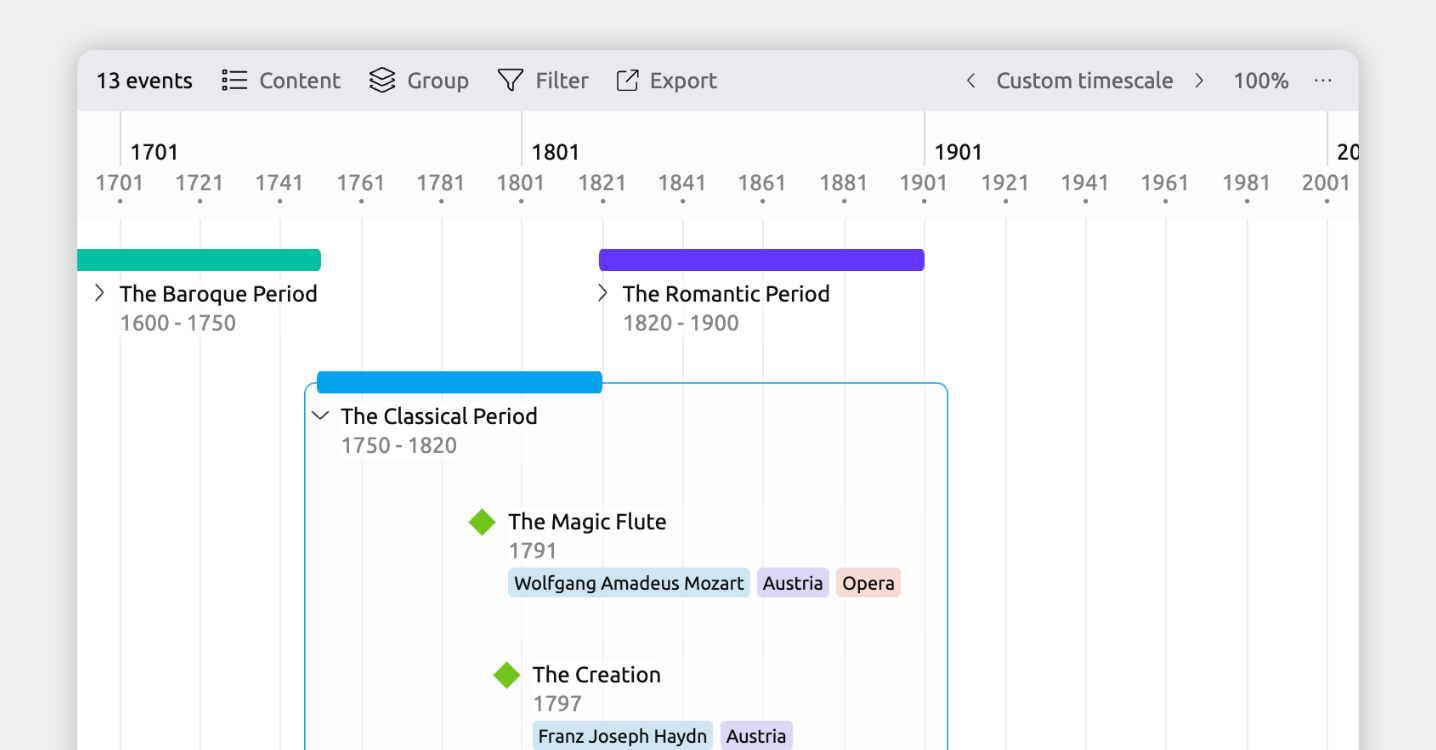
Nest events under a parent to break larger events into smaller, detailed sub-events, like battles in a war or subtasks in a task.
To nest items within the timeline, hold Cmd (Mac) or Ctrl (Windows), then drag one item onto another.
Show Progress on the Timeline
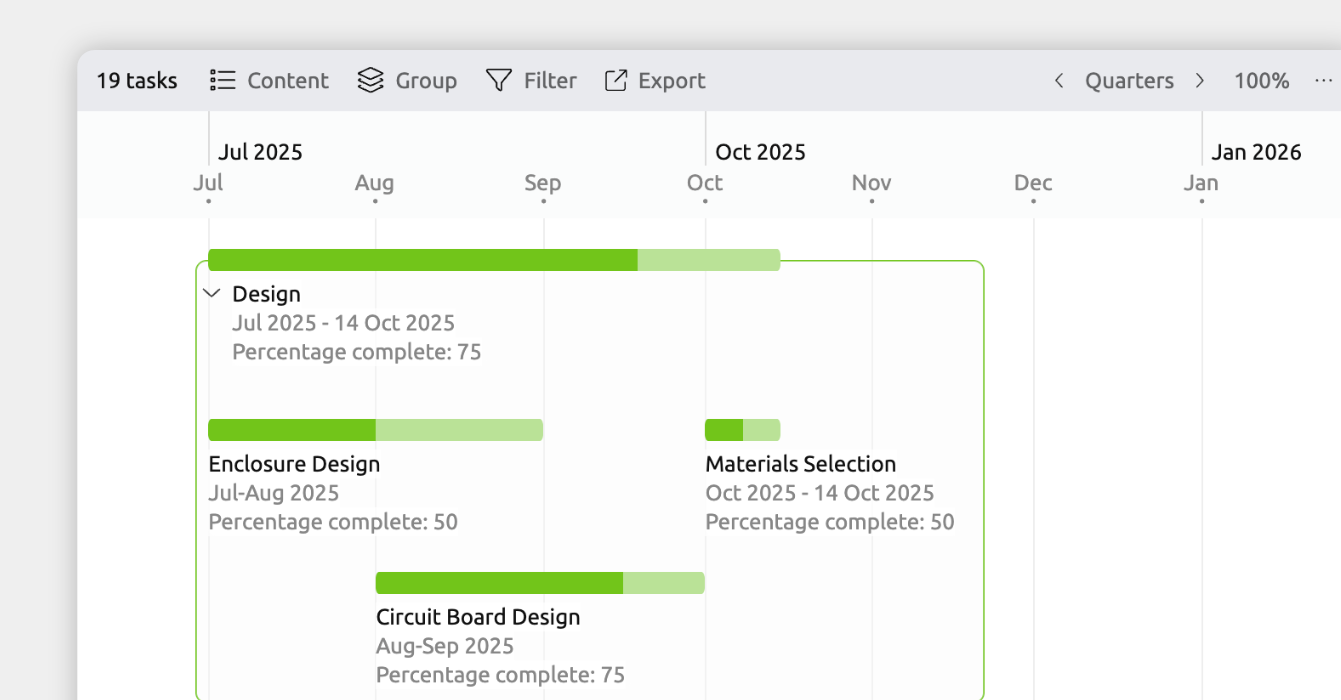
You can display progress directly on timeline markers to show how complete an event or item is. This is especially useful for tracking tasks, phases, or milestones over time.
The first step is to add a percentage property, which lets you record how complete each event or item is.
- Open Settings
- Select the Properties tab
- Add a new property and set:
- Property format: Percentage
- Indicate item completion: Enabled
- Show for item types: Choose the item types you want to track progress for
You can then set percentages for those events and items, and they will display as progress on the timeline.
- Select an event or item.
- Find the new property field in the inspector.
- Enter a value between 0 and 100.
Shortcuts and Quick Actions
Use the Keyboard to Create New Events
Create a new event or item using the keyboard:
- Press Cmd + N (Mac) or Ctrl + N (Windows).
How the new event or item is placed:
- If no item is selected, it’s created in the middle of the visible timeline.
- If an item is selected, the new item is created at the same date.
If the view isn’t set to show your file’s first item type, you can see shortcuts for creating other item types by clicking the + button in the sidebar.
Select Multiple Events or Items
You can select more than one event or item at a time, which lets you edit them together in the inspector.
- Hold Cmd (Mac) or Ctrl (Windows), then click each event or item you want to select.
- Hold Shift, click one item, then click another to select everything between them.
This is useful when you want to update dates, properties, or other details for several items at once.
Note for iOS: Long-press to enter Edit mode, then tap the items you want to select.
Measure Time Between Events
Quickly see the time difference between two events or items.
- Hold Option + Shift (Mac) or Alt + Shift (Windows).
- Click and drag from one event or item to another in the Timeline view.
- A message appears showing the time difference between them.
Where to Next?
Add and Customize Dates
Learn how to add, edit, and customize how your file's dates display and behave.
The Spreadsheet View
Use the Spreadsheet view to efficiently browse, sort, and edit your events and items.
Try Aeon Timeline free for 14 days
Get Aeon Timeline and easily visualize and organize your project.