Add Notes, Tags, and Extra Details
Aeon Timeline lets you add notes, tags, and extra information to your events and items. These details help you track details, progress, and anything else that matters to your work.
This article focuses on three ways to store information directly on an event or item:
- Summaries for descriptive notes
- Tags for flexible labeling
- Properties for custom text, number, option list, or yes/no values
Enable Summaries
Summaries are text fields you can use to add descriptions, background context, or detailed notes to an event or item.
To enable summaries:
- Open Settings.
- Select the Item Types tab.
- Select the item type you want to enable summaries for.
- Under Fields, add the Summary field.
The summary field will now appear in the inspector when you select items of that type.
Enable Tags
Tags are simple text labels that let you quickly and flexibly categorize your events and items. An item can have multiple tags, and the same tag can be shared across many items.
To enable tags:
- Open Settings.
- Select the Item Types tab.
- Select the item type you want to enable tags for.
- Under Fields, add the Tags field.
You’ll then be able to add and remove tags for items of that type from the inspector.
Add or Edit Custom Properties
Custom properties let you tailor Aeon Timeline to the way you work. They allow you to define exactly what notes and details you want to track on your events and items.
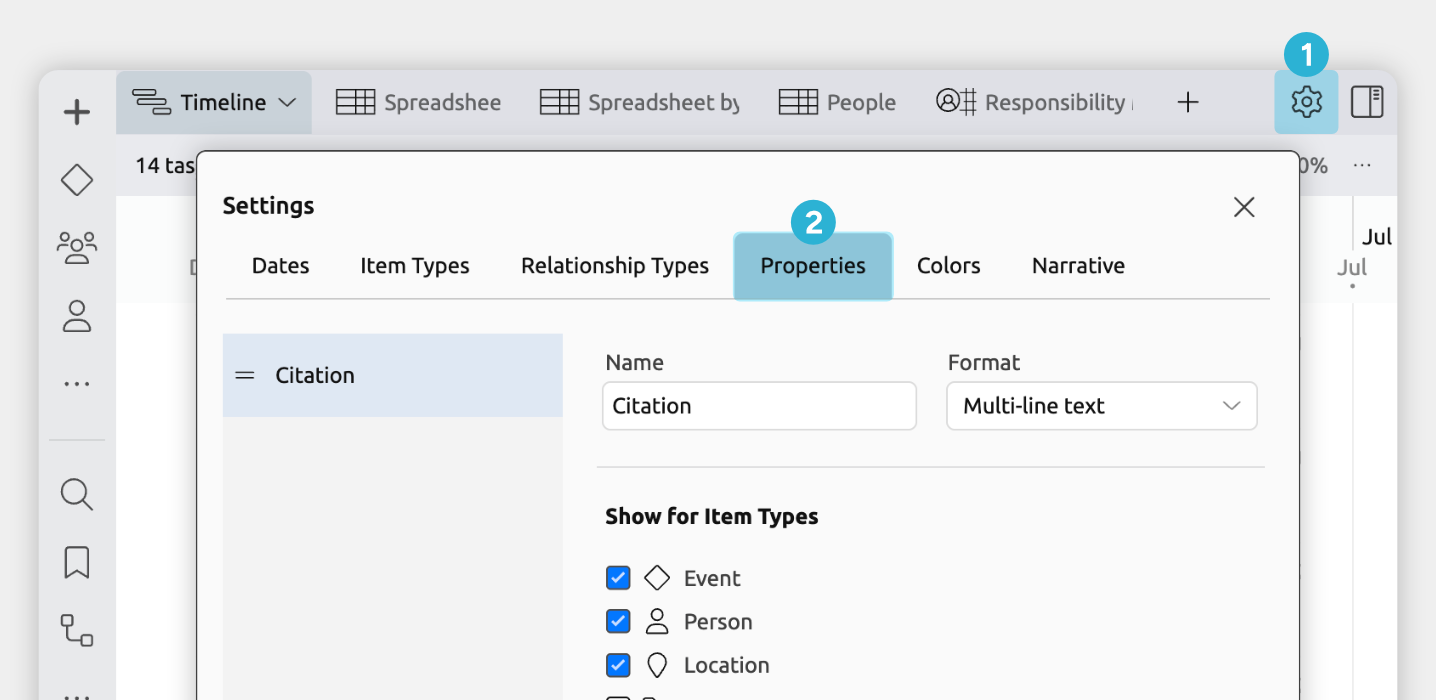
To add or edit a property:
- Open Settings
- Select the Properties tab
From here you can:
- Edit an existing property
Select it from the list on the left. - Create a new property
Click Add at the bottom of the left list.
How Aeon Timeline Shows Summaries, Tags, and Properties
Aeon Timeline shows summaries, tags, and properties in several places so you can see and manage them as you work.
In the Inspector
When you select an event, task, or item, the inspector shows its available fields. This is the main place to add or manage information for the selected item.
If the field isn’t visible, click Add and Edit Fields at the bottom of the inspector to add it.
On Item Cards in the Timeline View and More
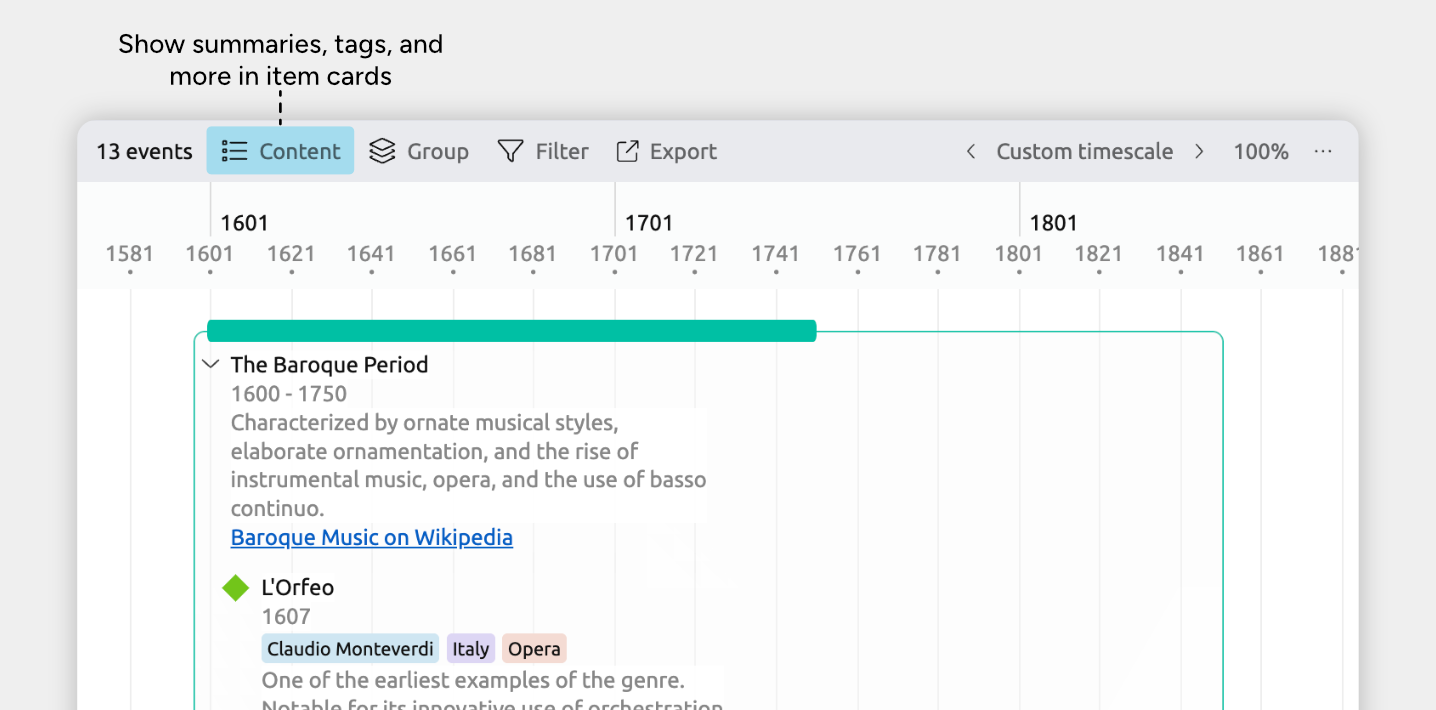
In views that use item cards, summaries, tags, and properties can be shown directly on each card.
Views that use item cards are:
- Timeline View
- Relationship View rows
- List View
- Narrative View
- Mindmap View
To show summaries, tags, and properties on item cards:
- Select or create a tab set to the Timeline, Relationship, List, Mindmap, or Narrative view
- Open the Content panel in the view header
- Under Fields, enable Summary, Tags and/or any of your custom properties.
These may appear under See More, depending on your settings.
Columns in the Spreadsheet view
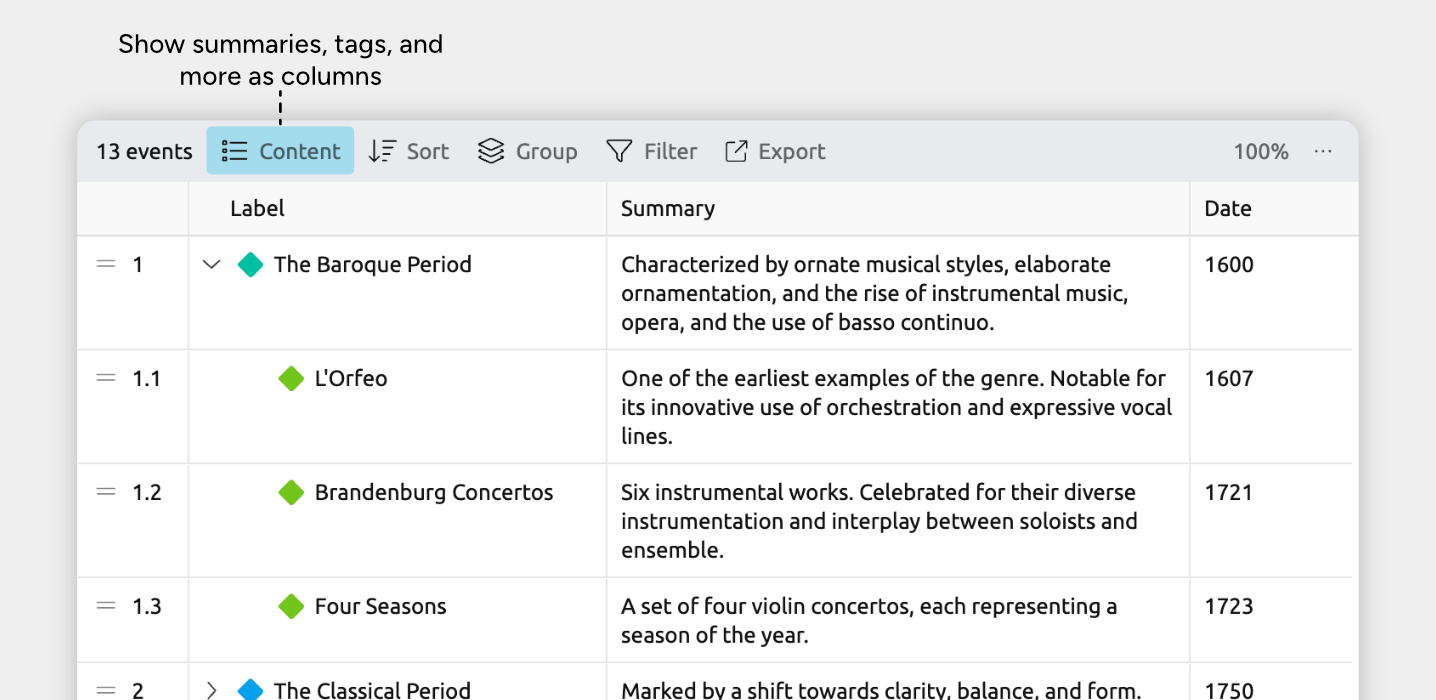
Summaries, tags, and properties appear as columns, making this the fastest way to review or edit information across many items at once.
To show summary, tag, or property columns:
- Select or create a tab set to the Spreadsheet view
- Open the Content panel in the view header
- Under Columns, enable Summary, Tags and/or any of your custom properties.
These may appear under See More, depending on your settings.
As Progress on Timeline Bars
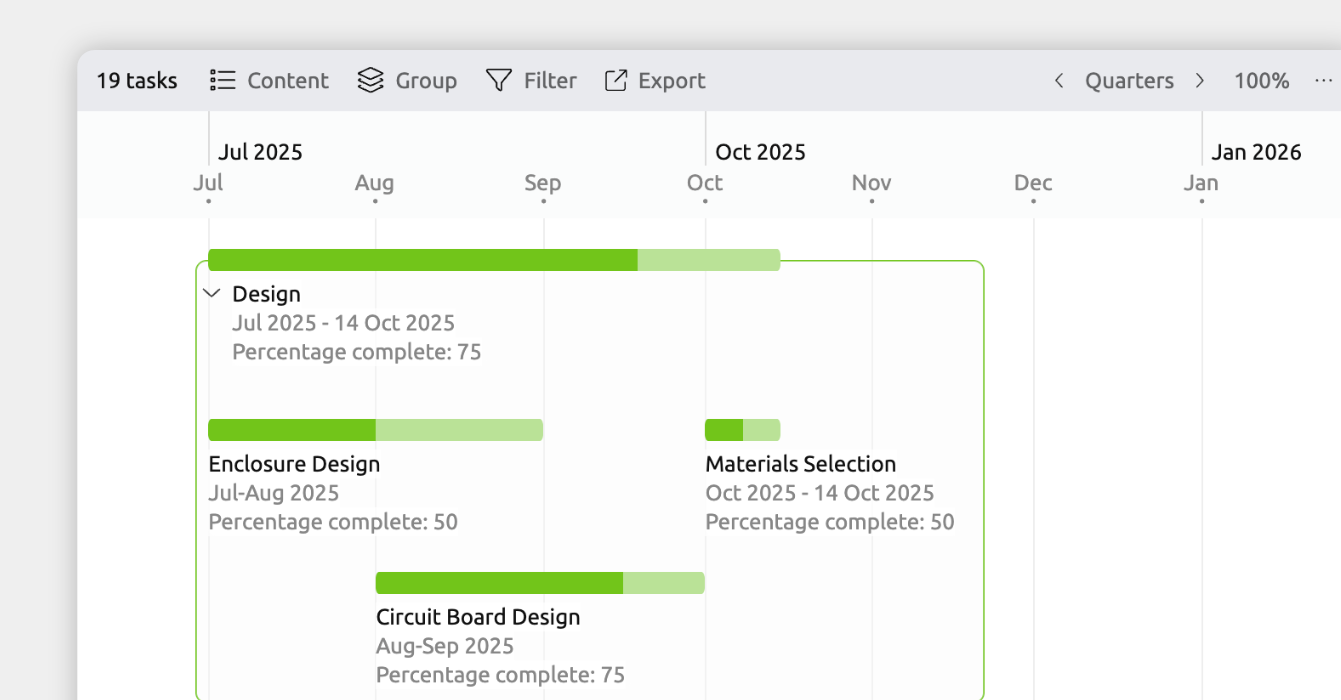
In the Timeline view, a percentage property set to indicate item completion appears as progress on the timeline bar.
The first step is to add a percentage property, which lets you record how complete each event or item is.
- Open Settings
- Select the Properties tab
- Add a new property and set:
- Property format: Percentage
- Indicate item completion: Enabled
- Show for item types: Choose the item types you want to track progress for
You can then set percentages for those events and items, and they will display as progress on the timeline.
- Select an event or item.
- Find the new property field in the inspector.
- Enter a value between 0 and 100.
Property Settings Reference
Name
The label used for the property. This is how the field appears in the inspector and views, such as a column in the Spreadsheet view.
Format
The format determines what kind of information the property stores and how it’s displayed.
Available format types include:
- Text: for references, notes, or free-form information
- Numbers: for values like Cost, Word count, or Progress
- Checkbox: for yes/no values such as Completed
- Option list: for choosing a single value from a predefined list, such as Status
Options
(Shown only for Option list properties)
Option lists let you define a fixed set of values to choose from. This is useful when you want consistency — for example, limiting status values to Not started, In progress, or Done.
Calculate parent values from children
(Shown for Checkbox and Number properties)
When enabled, the value of a parent item is calculated automatically from the values of its nested child items.
This is helpful when a larger item is made up of smaller parts and you want the parent to stay up to date without manual edits.
Examples:
- A Cost property on a parent task can be calculated as the total cost of all its sub-tasks
- A Completed checkbox can be ticked automatically when all sub-tasks are complete
When this option is enabled, you can choose how child values are combined, such as:
- Checkboxes: all children ticked, or any child ticked
- Numbers: sum, average, minimum, or maximum
Indicate item completion
(Shown for Checkbox, Option List, and Percentage properties)
This option allows a property to control whether an item is considered complete.
When enabled:
- Completed items are shown with a line through their text in views
- If completion is based on a percentage, that progress will also be shown directly on timeline bars in the Timeline view.
Completion can be based on:
- A checkbox being ticked
- A percentage reaching 100%
- An option list being set to a specific value
Only one property per file can be used to indicate item completion.
Show for Item Types
Choose which item types display this property as a field in the Inspector.
The property will only appear for those item types, so other items won’t show unused or unnecessary fields.
Where to Next?
Connect Events, People, and More
If you want to show how events or items relate to each other — for example, linking an event to the people involved or connecting a task to the project it belongs to — use relationships instead.
Add Links, Files, and Images
Learn how to attach images, link to files, or add supporting documents.
Try Aeon Timeline free for 14 days
Get Aeon Timeline and easily visualize and organize your project.