Organize a Separate Story Structure
The narrative lets you create a story-focused order for your project. Instead of organizing events by when they happen, you organize them by how they appear in your story.
You choose which events and items belong in the narrative, arrange them in any order you like, and place them into folders that represent acts, chapters, scenes, or other sections.
Why Use the Narrative
Use the narrative when you want to focus on how your story is presented, rather than your timeline of events.
The narrative is especially useful when:
- Your timeline contains more than what is used in your story
If your file includes not only your story events, but research, backstory, or world history as well, you can use the narrative as a place to focus only on story events. - You want to organize events into acts, chapters, or scenes
Place events into folders that reflect your story’s structure to make it easier to see how your story will flow. - You’re telling a non-linear story
Arrange events in the order that they are presented in your novel or project, rather than the order they occur in time. - You want to sync with Scrivener or Ulysses
The narrative is required for syncing with Scrivener or Ulysses, and is used to match documents from those apps with folders and events in Aeon Timeline.
Enable the Narrative
Before you can use narrative views, you’ll need to enable the narrative.

- Open Settings.
- Select the Narrative tab.
- Enable Track independent narrative.
- Optionally customize the item types that are allowed in the narrative.
You might include other item types that you are using to represent events or story scenes.
Once enabled:
- A Narrative tab appears in the toolbar.
- You can create additional narrative views, all ordered by narrative order.
- A new Narrative Folder item type becomes available.
How the Narrative Works Across Views
The narrative is a story order for selected events and folders, not a single view.
That order can then be shown in one or more views, each with its own layout or display options.
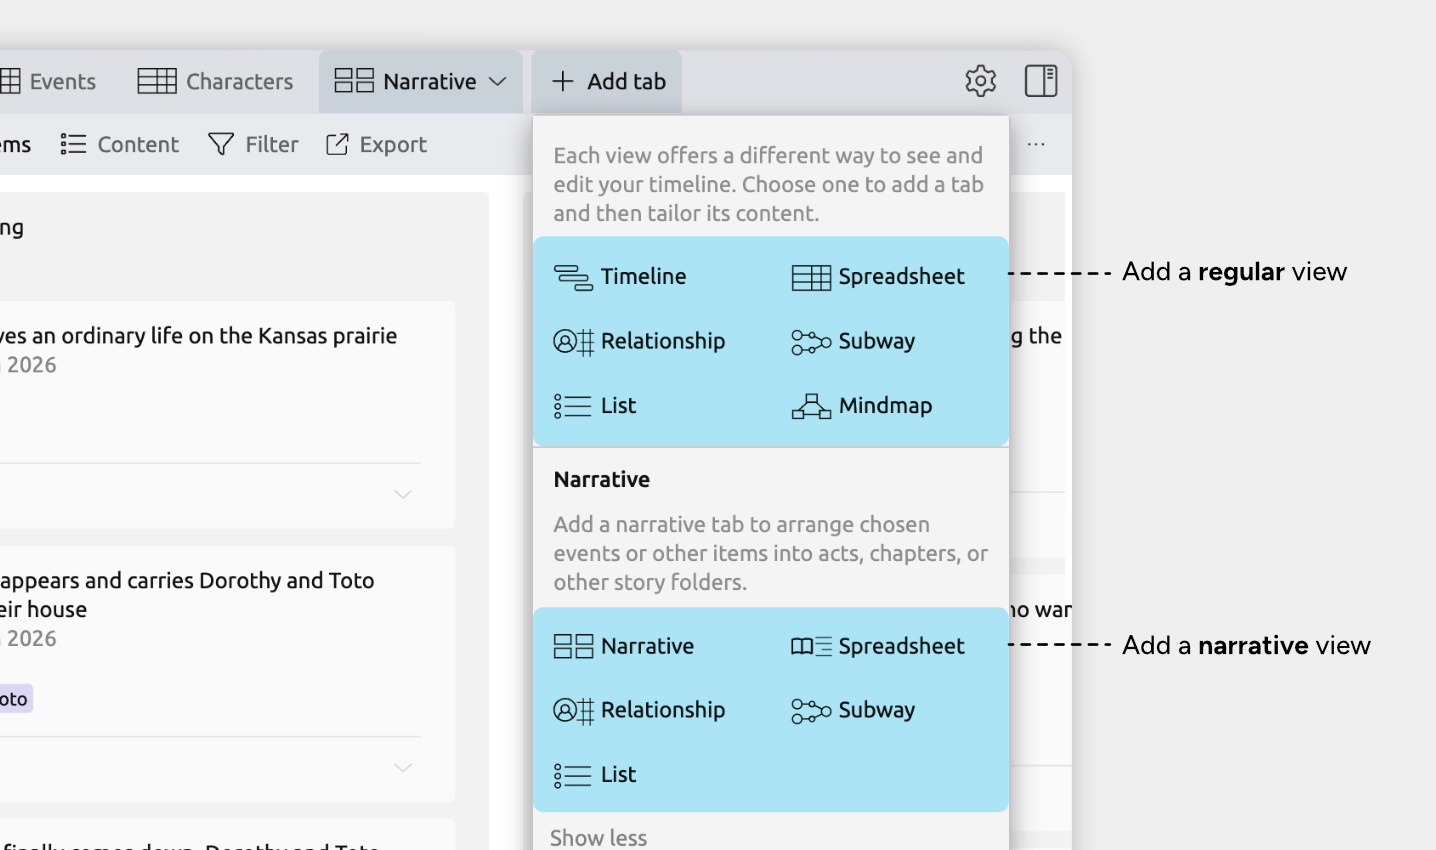
Narrative-Ordered Views vs Regular Views
- Regular views focus on your timeline data. You choose what to show by item type (such as events, characters, or locations) and can sort and organize items by many fields, like date, color, label, or other details.
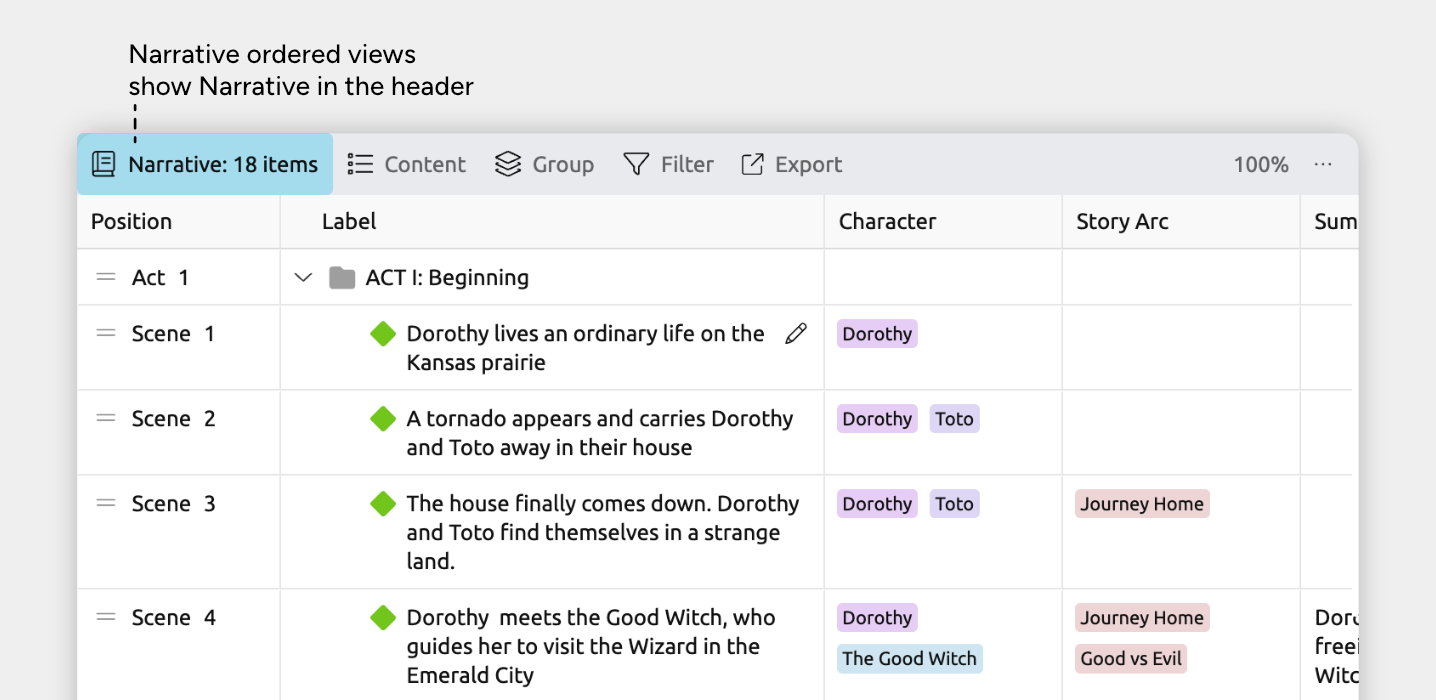
- Narrative-ordered views focus on story structure. They show only the events and folders you’ve chosen for your story, always arranged in narrative order rather than by date.
Together, these views let you manage both timeline planning and story structure, using the same shared events and items.
Use the Narrative to Outline Your Story
You can build and refine your narrative in any narrative-ordered view. To learn more about the different views that can display the narrative, see:
To build out your narrative:
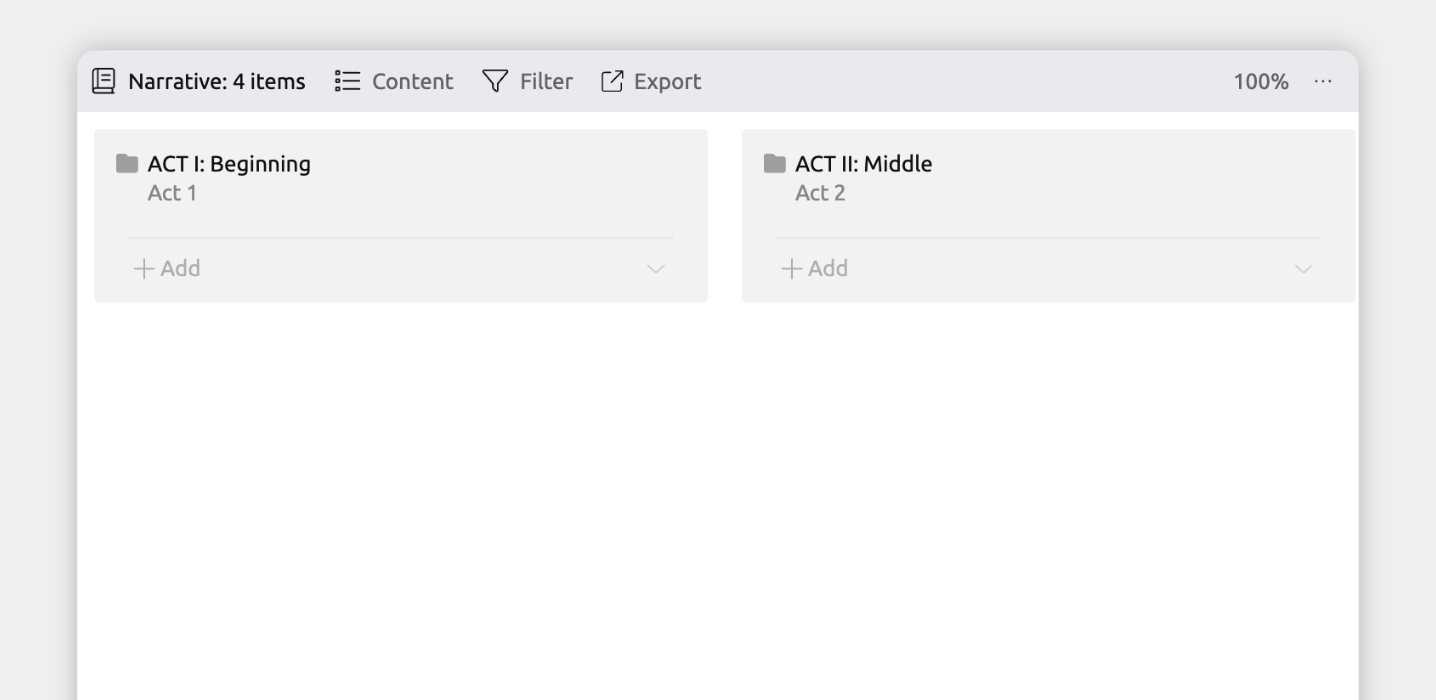
- Build Structure with Narrative Folders
Start by adding narrative folders to define the main structure of your story. Folders can represent acts, chapters, scenes, or any other sections that make sense for your project.
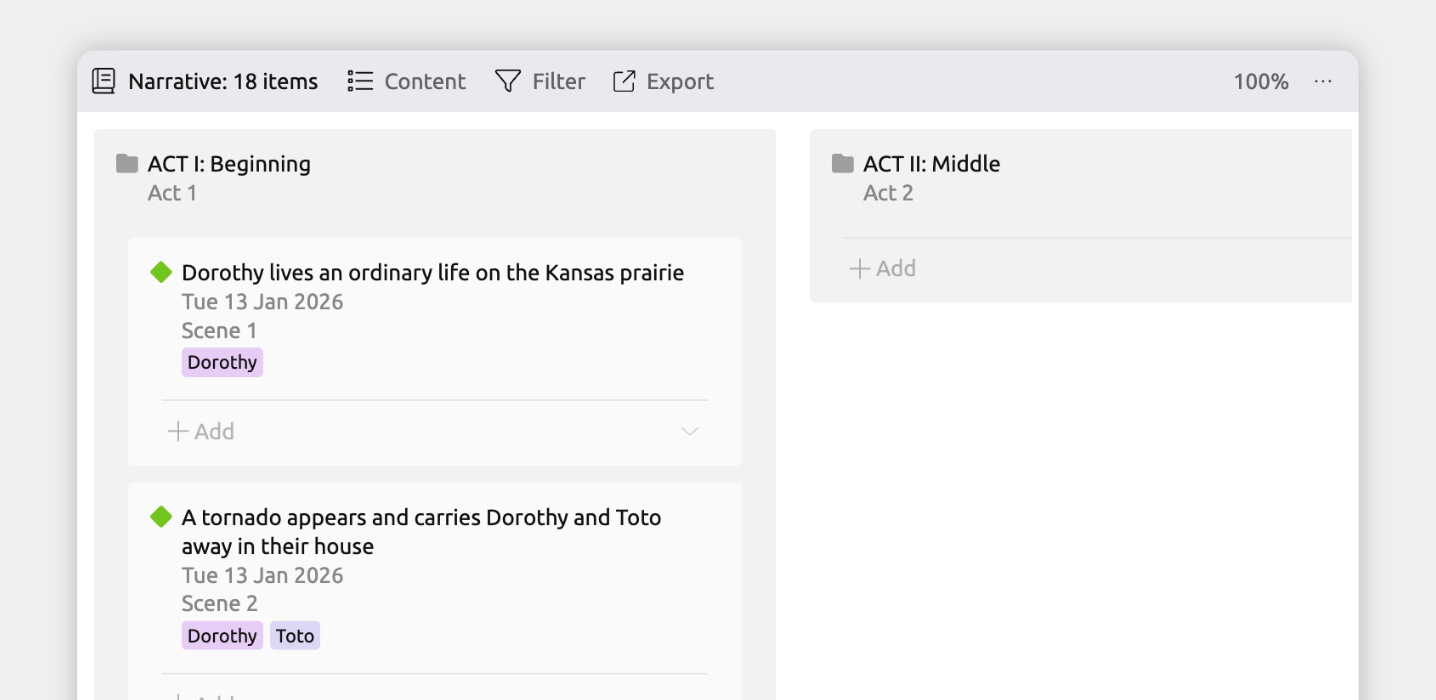
- Place Events into Story Order
Add events (and other allowed item types) to the narrative and arrange them in the order you want readers to experience them.
You can either create new events, or share them from your timeline.
- Rearrange Without Affecting the Timeline
Reordering events in the narrative changes only their story order. Dates, durations, and timeline positions remain unchanged.
- Edit Details Anywhere
The narrative doesn’t create copies of events. It uses the same events and items as the rest of your file.
If you edit an event’s label, notes, relationships, or assigned characters in any view, those changes appear everywhere, including in the narrative.
Show and Customize Narrative Position
Events and folders in the narrative use labels and numbering, such as Act 1 or Chapter 2. These are assigned automatically based on your settings. Together, the section and label are referred to as the narrative position.
Show an Event or Item's Narrative Position
To show narrative position in the inspector:
- Open Settings.
- Select the Item Types tab.
- Select the item type you want to show narrative positions for.
- Under the Fields section, add the Narrative field.
To show an item's narrative position in a view:
- Select the tab where you want to show the narrative position.
- Open the Content panel in the view header.
- Enable the Narrative Position field or column.
This may appear under See More, depending on your settings.
Note for the Spreadsheet view: If you are using a narrative order spreadsheet view, the narrative position is always shown in the leftmost column.
Change an Event or Folder's Section Label
You can choose between different section labels—such as Act, Chapter, or Scene—or create your own custom labels.
To change an event or folder's section label:
- Select an event or folder to open the inspector.
- Find the Narrative field.
- Use the Section dropdown to choose a label.
By default, items use Automatic section labels. These are based on hierarchy depth and your label settings—for example, top-level folders might be labeled Acts, with Chapters nested inside them. You can choose to use a specific label instead.
To customize what section labels are available or used when set to Automatic, go to Settings → Narrative.
Change How Sections are Numbered
Sections can be numbered either like:
- Act 1, Scene 2; or
- Scene 1.2
To change this:
- Open Settings
- Select the Narrative tab
- Under Numbering System, choose Book or Continuous
Sync with Scrivener or Ulysses
The narrative provides the link between your timeline and your writing software. It’s used to match folders and events in Aeon Timeline with documents in Scrivener or Ulysses.
To learn more about setting up and using syncing, see Scrivener and Ulysses →
Where to Next?
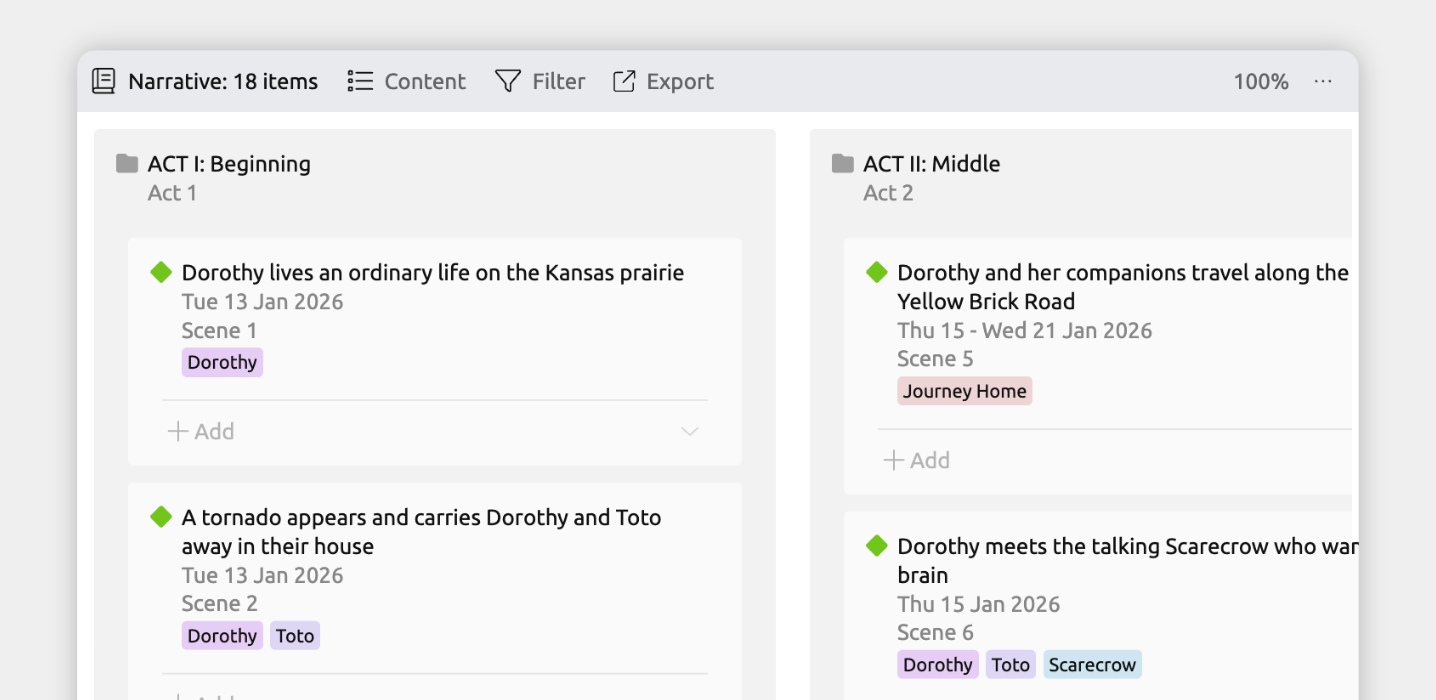
The Narrative View
Use the Narrative view to organize your story visually using cards.
Try Aeon Timeline free for 14 days
Get Aeon Timeline and easily visualize and organize your project.