Categorize and Group Events and Items
As your timeline grows, grouping helps you break your work into meaningful sections. You can organize the same set of events or items in different ways to highlight different aspects of your timeline in each view.
Grouping visually rearranges how items appear in a view, without changing their dates or hierarchy.
Examples of Grouping
You might use grouping to:
- See how different parts of your timeline flow together
For example, grouping events by story arc to see how different threads of your story progress over time. - See responsibility or ownership at a glance
For example, grouping tasks by team members to quickly see who is working on what. - Break large sets of items into manageable sections
For example, grouping hundreds of events into logical sections—such as phases, topics, or periods—so you can focus on one section at a time.
You’re not limited to these examples. You can group items in whatever way best helps you understand your data in a particular view.
Add and View Groups
You can use grouping in several view types in Aeon Timeline:
- Timeline view
- Spreadsheet view
- Relationship view
- List view
- Item type sidebar panels
Grouping is configured per view, which means you can:
- Use different grouping setups in different views, or
- Apply the same grouping across multiple view types.
This makes it easy to explore your timeline from different perspectives without duplicating or reorganizing your data.
There are several kinds of information you can group by in Aeon Timeline: relationships, item types, color, tags, and list property options
Group by Relationship
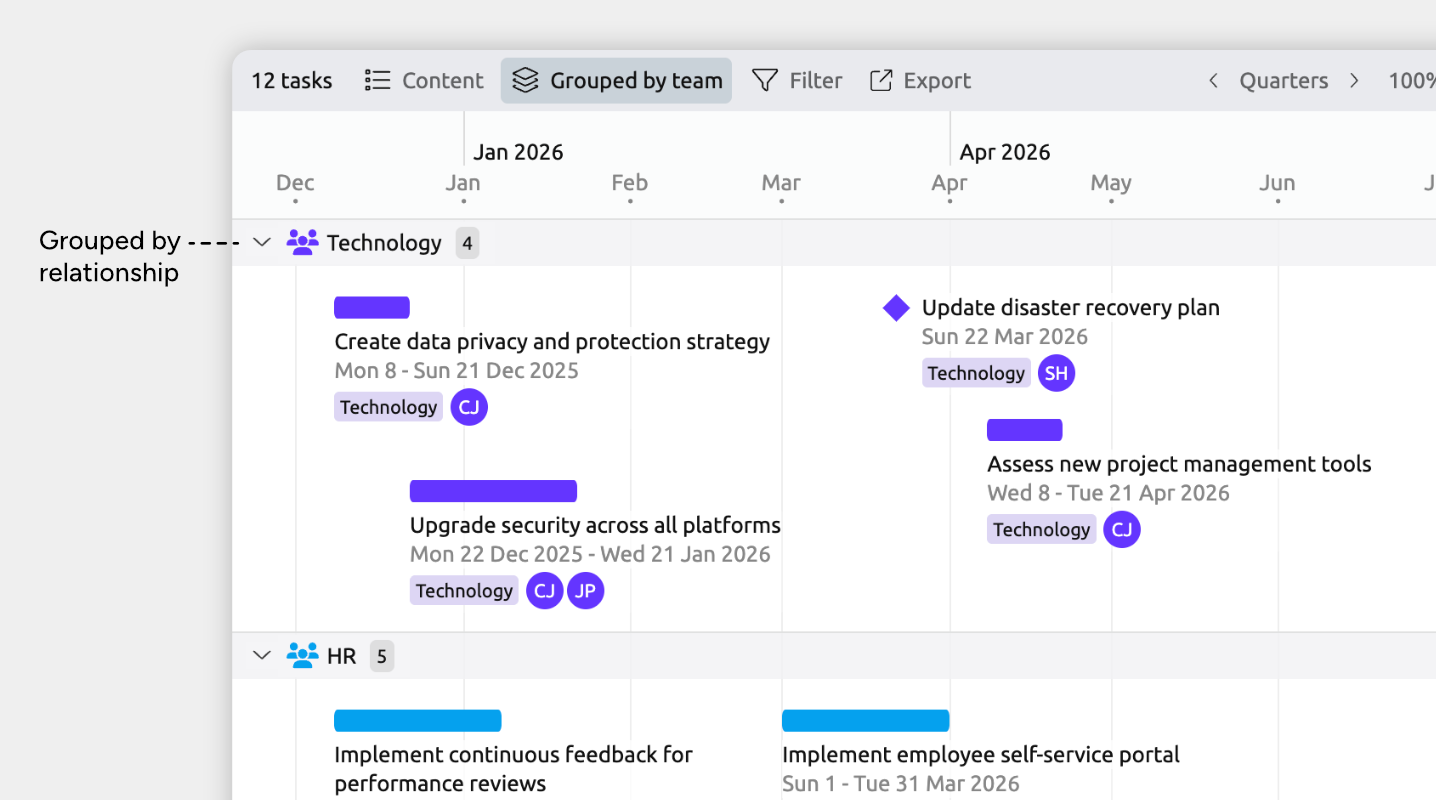
Grouping by relationship lets you categorize events or items based on the people, places, or other items they’re connected to.
For example:
- Group tasks by the person assigned.
- Group story events by the character involved.
- Group historical events by the place they occurred in.
This is a powerful way to reuse the relationships already in your timeline to create meaningful visual categories that support how you work.
Grouping by relationship works especially well when:
- Events or items need to belong to more than one group, because they may have multiple relationships.
- You want to switch between different ways of viewing the same data — for example, grouping by character in one view and by story arc in another.
How to Group by Relationship
To create relationships between events, people, and other items, see Connect Events, People, and More →
To enable grouping in a view:
- Open the view where you want to use grouping.
- Open the Group panel in the view header.
- Find the relationship you want to group by, and expand its section if it is collapsed.
- Select the related items you want to group by, or choose All to show groups for all options.
Reorder Relationship Groups
When you group by relationships, the order of the groups follows the order of the related items.
To change the order:
- Open the related item type’s panel in the sidebar.
- Reorder items by dragging them into your preferred order, or
- Use the panel’s sort options to automatically sort items by label, color, or date.
Group by Item Type
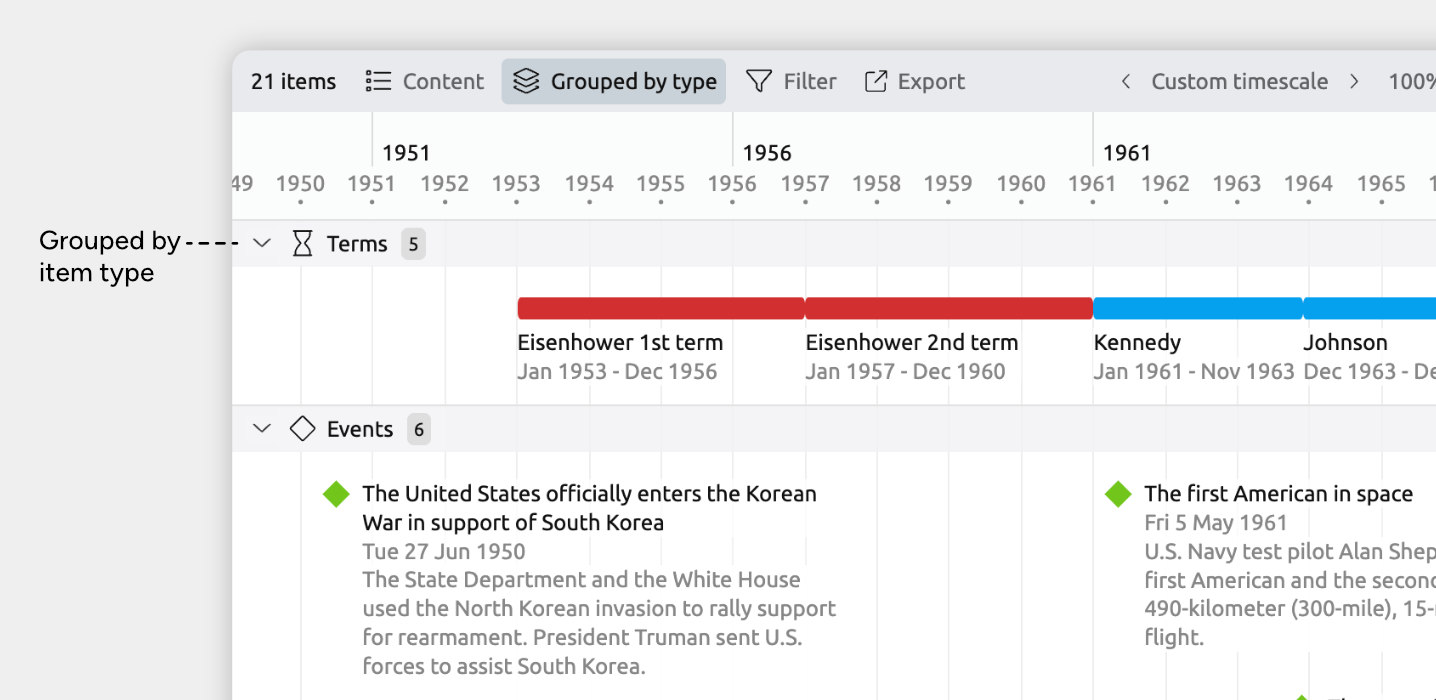
Item types define what kind of thing each item represents — for example, Events, Characters, Tasks, Locations, or any custom types you’ve created.
Grouping by item type is useful when:
- You want broad, structural groupings.
- Each event or item belongs to a single, clearly defined type.
How to Group by Item Type
Grouping by item type uses the item types already defined in your timeline. If you need to add or customize item types, see Customize Item Types →
To enable grouping by item type:
- Open the view where you want to use grouping.
- Open the Group panel from the view header.
- Find the Item Type field, and expand its section if it is collapsed.
- Select the item types you want to group by, or choose All to show groups for all types.
Reorder Item Type Groups
When you group by item type, the order of the groups follows the order of item types in your file.
To change the order:
- Open Settings.
- Select the Item Types tab.
- Drag item types into your preferred order.
Group by Color
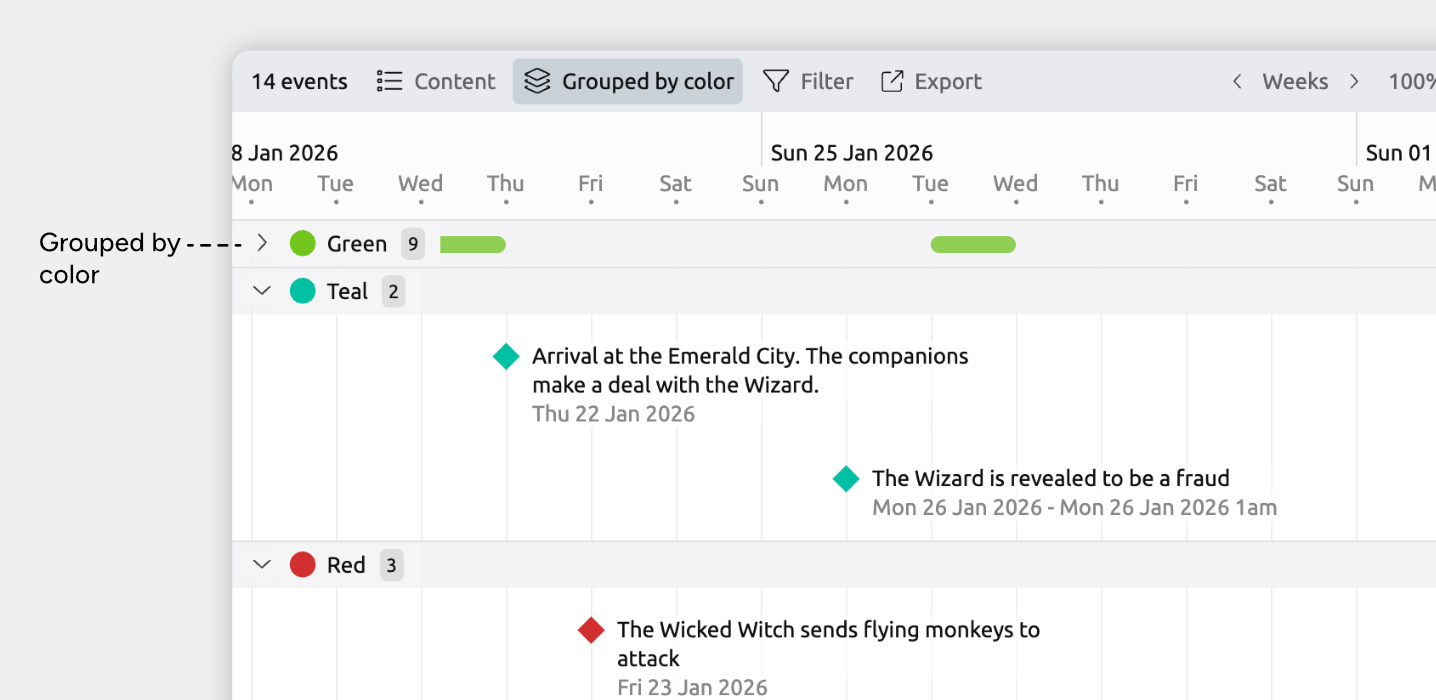
Colors provide a lightweight way to visually categorize items.
Grouping by color works well when you’ve already used colors to represent different categories of events or items, and you want a quick visual breakdown without adding extra fields or relationships.
How to Group by Color
- Open the view where you want to use grouping.
- Open the Group panel from the view header.
- Find the Color field, and expand its section if it is collapsed.
- Select the colors you want to group by, or choose All to show groups for all colors.
Reorder Color Groups
When you group by color, the order of the groups follows the color order defined in your file’s settings.
To change the order:
- Open Settings.
- Select the Colors tab.
- Drag colors into your preferred order.
Group by Tag
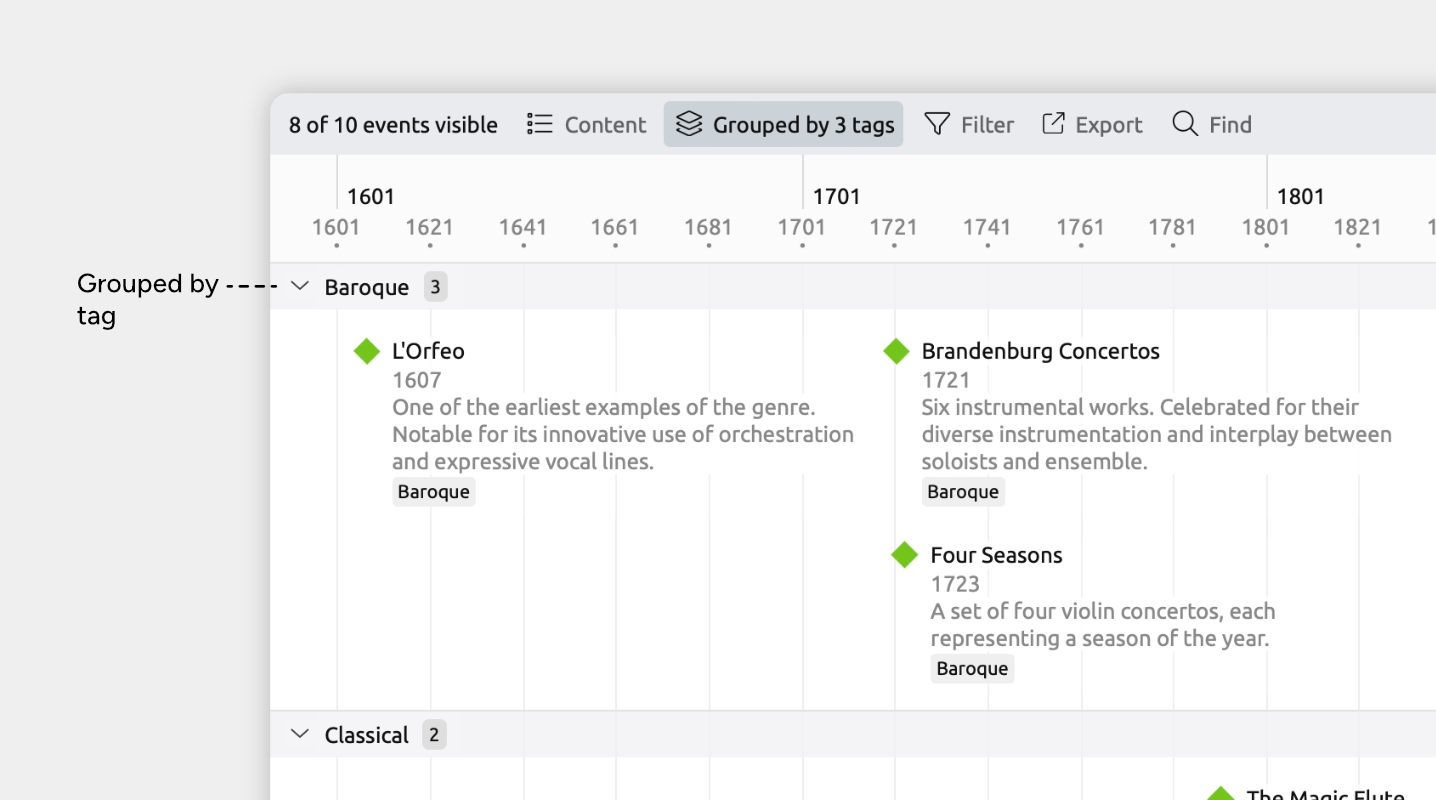
Tags are simple text keywords you can add to any event or item.
Grouping by tag turns those keywords into visual categories, which is useful when you've already tagged items and want to see them organized by tag without setting up relationships or fixed fields.
Grouping by tag works especially well when:
- You've already tagged items and want to see them organized by tag without setting up relationships or fixed fields
- You want a flexible, ad-hoc way to categorize items that can evolve as you work.
How to Group by Tag
- Open the view where you want to use grouping.
- Open the Group panel from the view header.
- Find the Tags field, and expand its section if it is collapsed.
This is only available if you have tagged events or items. - Select the tags you want to group by, or choose All to show groups for all tags.
To learn more about adding tags, see Add Notes, Tags, and Extra Details →
Group by List Property Option
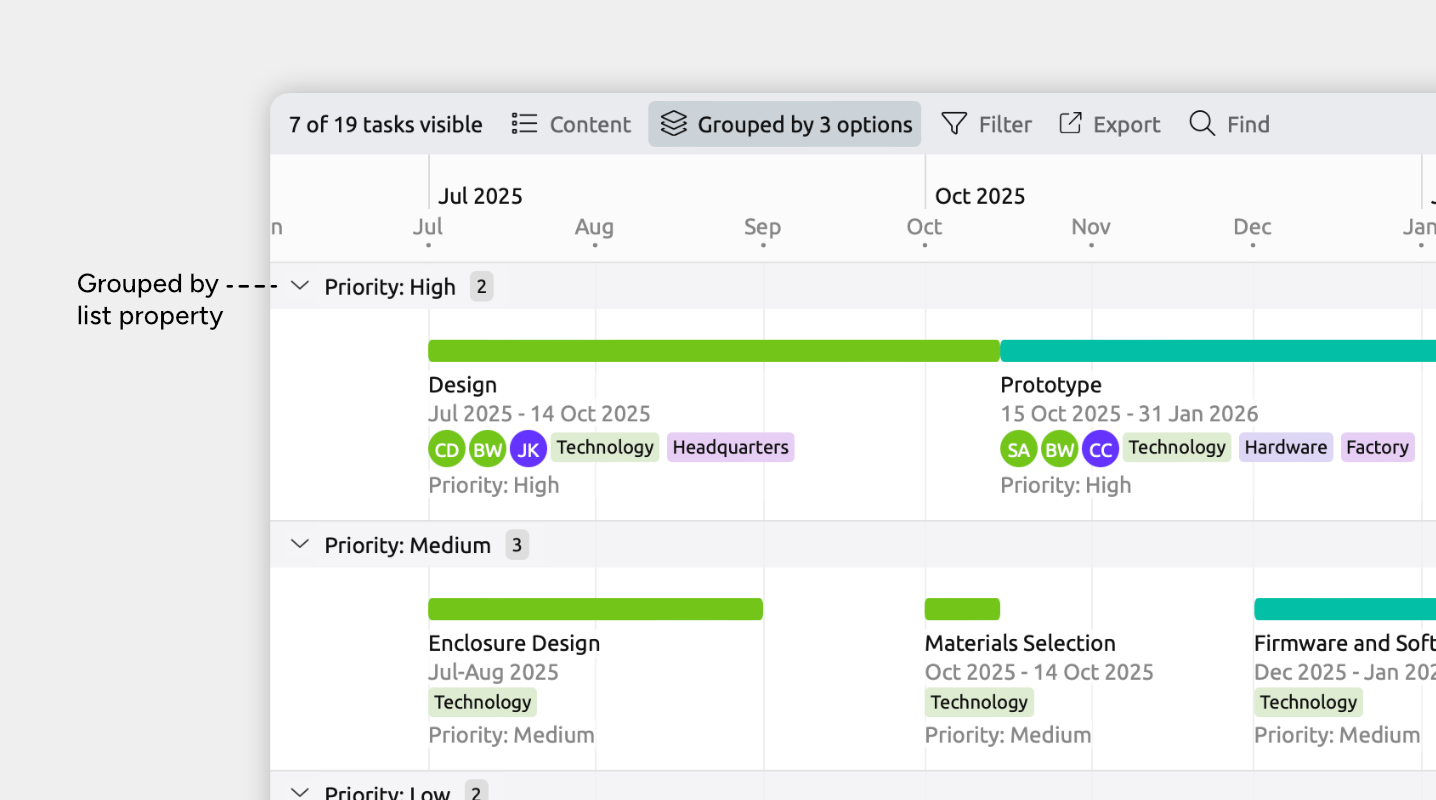
List properties (option lists) let you define a fixed set of text options — such as High, Medium, or Low priority — in settings, then assign one to each item.
Grouping by a list property option works especially well when:
- You want structured groups drawn from a controlled set of values.
- Each item has a single, clearly defined option.
How to Group by List Property Option
- Open the view where you want to use grouping.
- Open the Group panel from the view header.
- Find the list property you want to group by, and expand its section if it is collapsed.
- Select the options you want to group by, or choose All to show groups for all options.
Reorder List Property Groups
When you group by a list property, the order of the groups follows the order of the options defined in settings.
To change the order:
- Open Settings.
- Select the Properties tab.
- Select the list property you want to reorder options for.
- Drag its options into your preferred order.
Work with Grouped Events and Items
Once grouping is enabled, groups appear as their own sections in the view. You can collapse and expand them, and add items directly to groups.
Expand and Collapse Groups
Each group has a header row with an arrow you can click to collapse or expand the group.
In the Timeline view, collapsed groups show a preview of the events and items inside, so you still get a sense of what’s there.
Tip: Right-click a group header and choose Expand All Groups or Collapse All Groups to quickly open or close every group in the view.
Add an Event or Item Within a Group
You can create new events or items directly inside a group. How you do this depends on the view you’re using:
- Timeline view: Double-click inside a group.
- Spreadsheet, Relationship, or List views, or item type sidebar panels: At the bottom of a group, type in the New Item row and press Enter.
The new item automatically matches the group you created it in.
- Grouped by relationship: The item gains a relationship to the group.
- Grouped by item type: The item uses that item type.
- Grouped by color: The item uses that color.
- Grouped by tag: The item gains that tag.
- Grouped by list property option: The item is assigned that option.
This makes it faster to create items that are already organized the way you need them.
Move Events or Items Between Groups
How dragging behaves depends on what the view is grouped by.
When Grouped by Item Type
YYou can’t drag items between item type groups. To change an item’s type, select it and change the type in the inspector. If changing the type would remove data (because different item types use different fields), the inspector will warn you before you proceed.
When Grouped by Color
Dragging an event or item into a different group changes its color to match that group.
When Grouped by Relationship
- Dragging an item into another group adds a new relationship for that item.
- The item is added to the new group but not removed from the original group.
- All existing relationships are kept.
A single event or item can belong to multiple relationship-based groups at the same time. For example, if an event involves more than one character, you can drag it into another character’s group to add that character.
When Grouped by Tag
Dragging an item into another group adds that tag to the item. As with relationships, the item is added to the new group but not removed from the original, since an item can hold multiple tags at once.
When Grouped by List Property Option
Dragging an item into another group changes its option to match that group, since a list property holds a single value.
Remove an Event or Item from a Group
How you remove an event or item from a group depends on what the view is grouped by.
When Grouped by Relationship
Removing an item from a relationship group means removing that relationship.
- Select the event or item to open the inspector.
- Find the relationship you want to remove.
- Click the … icon and choose Remove relationship.
When Grouped by Tag
Removing an item from a tag group means removing that tag from the item.
- Select the event or item to open the inspector.
- Find the tag you want to remove.
- Click the x icon on the tag to remove it.
When Grouped by List Property Option
Removing an item from a list property group means clearing its option for that property.
- Select the event or item to open the inspector.
- Find the list property.
- Clear the selected option.
More Ways to Categorize Items
Grouping helps visually categorize events or items in a view. There are also other simple ways to categorize and organize items.
Tags
Tags are simple text keywords you can add to any event or item. You can use them to filter your timeline or quickly find related items later.
Options Lists
Option lists are useful for fixed categories, such as status or priority. You define the available options in settings, then choose one option for each item.
Learn more about Adding Notes, Tags, and Extra Details →
Try Aeon Timeline free for 14 days
Get Aeon Timeline and easily visualize and organize your project.